
Garage Upgrades and Tools
So here is where I will post upgrades to the garage and any shiny new or used tools as well as any tool maintenance I end up doing. Since this seems like it is going to be quite a long page so you can check out the latest update HERE
Update #1
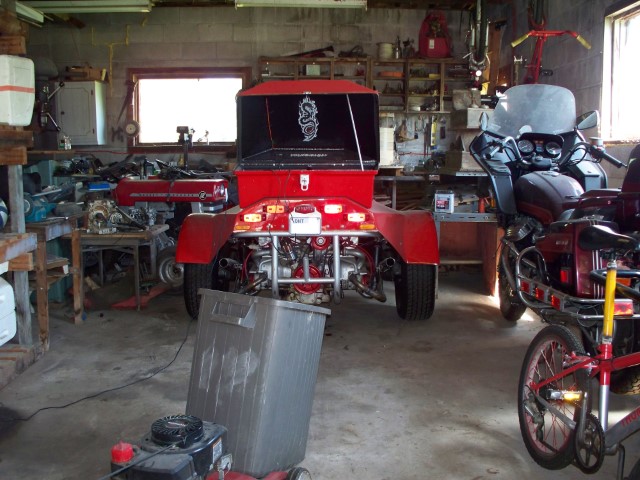
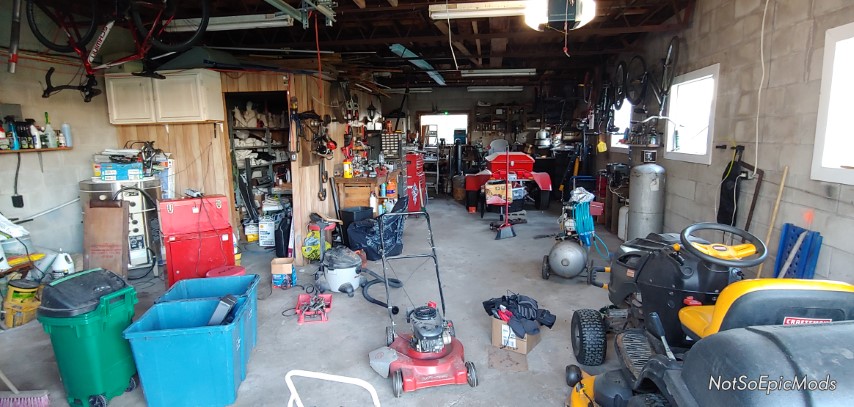
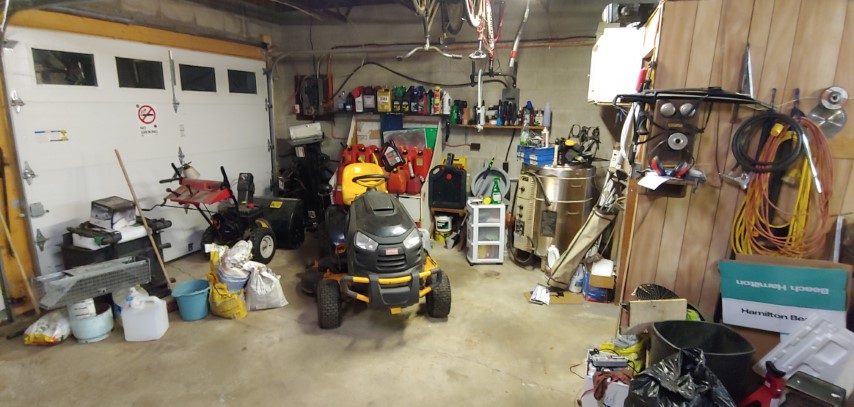
Here are some of the oldest pictures I could find of the garage. Now that I look at it, in the pictures it looks like there’s a lot of space but in reality, we didn’t even have enough space to fit a car inside.

Update #2
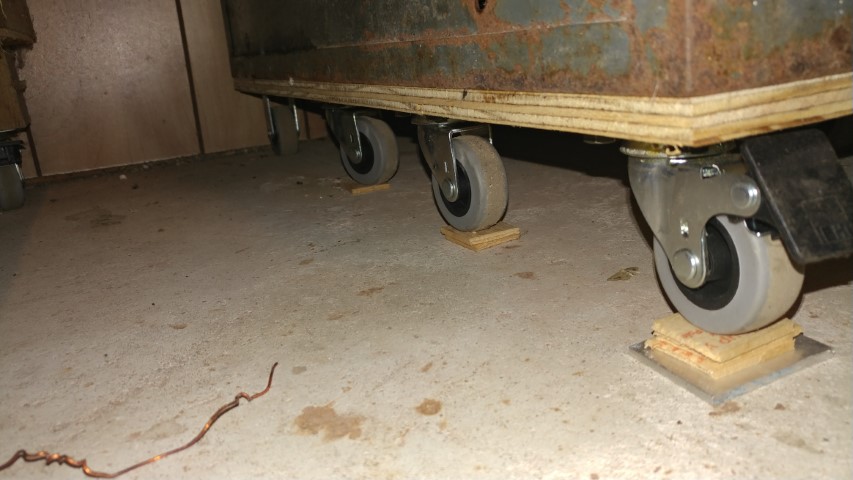
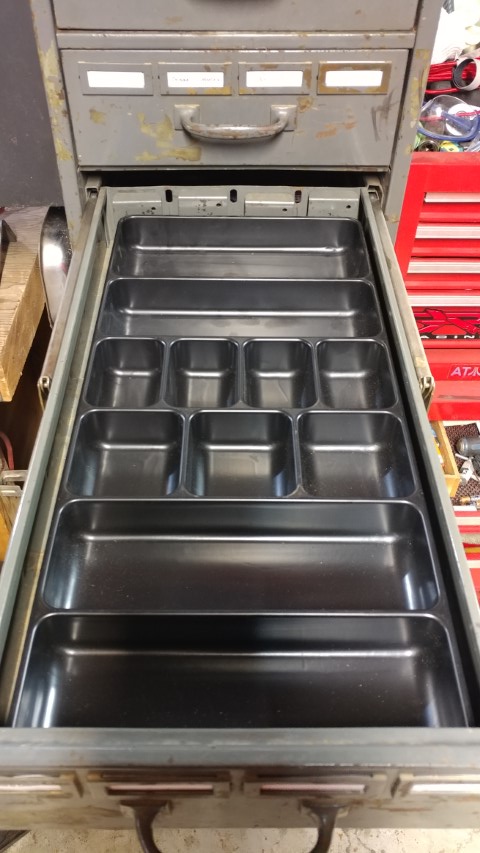
So I have this old filing cabinet that I will be using to store things such as small engine parts, nuts and bolts, tapes and glues, etc.

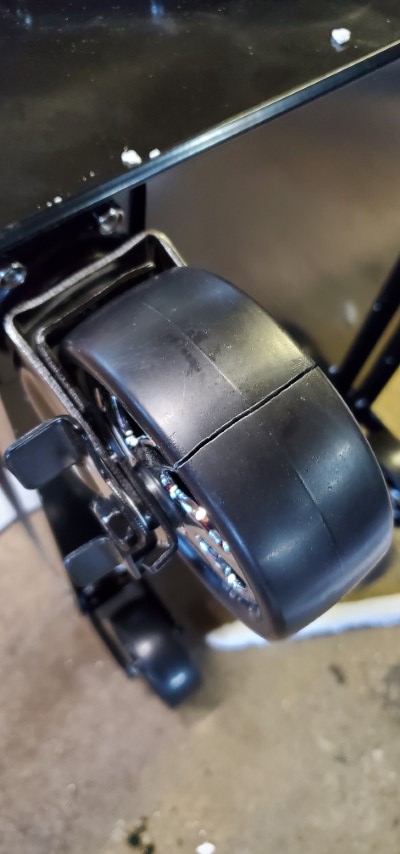
Also added some wheels to it to make it mobile if I ever need to move it. To be within the caster’s rated capacity I had to use 8 of them. You’ll see I had to shim the wheels due to the floor slope.
Update #3
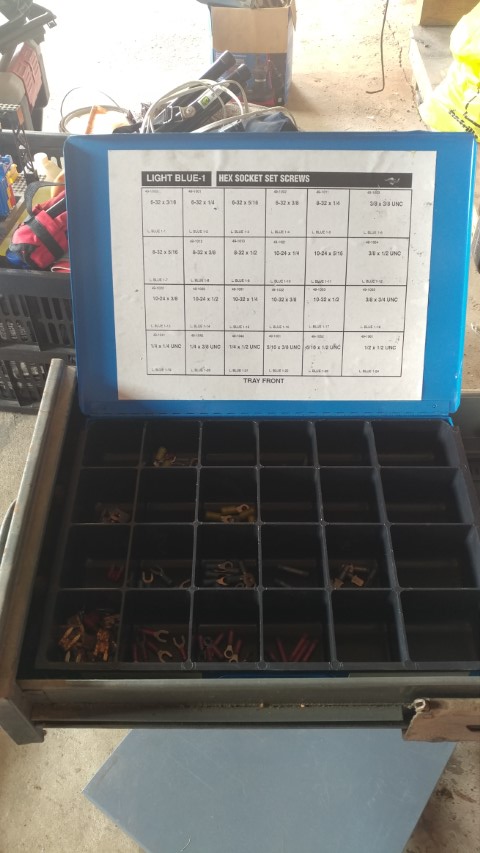
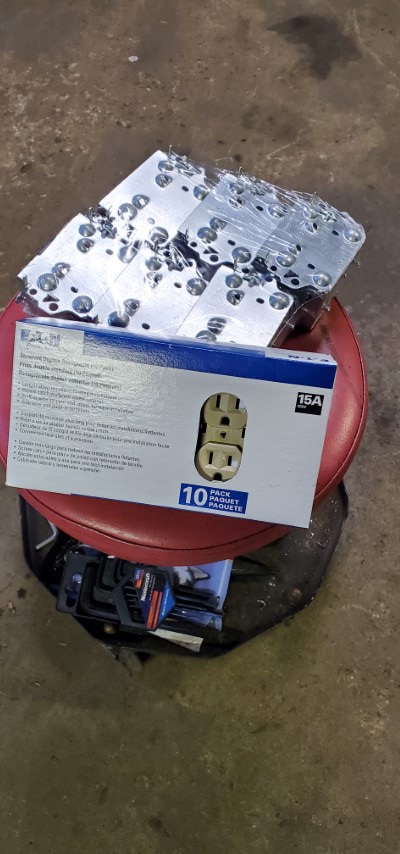
Sorting and adding the electrical connectors to the filing cabinet.

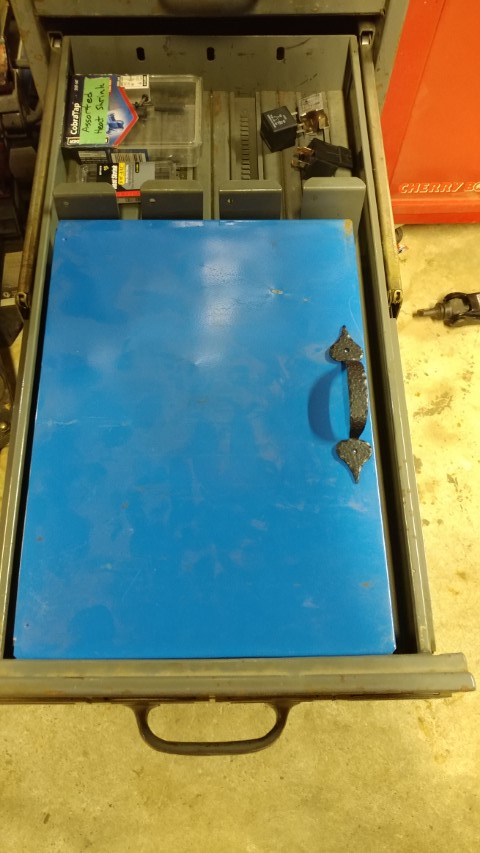
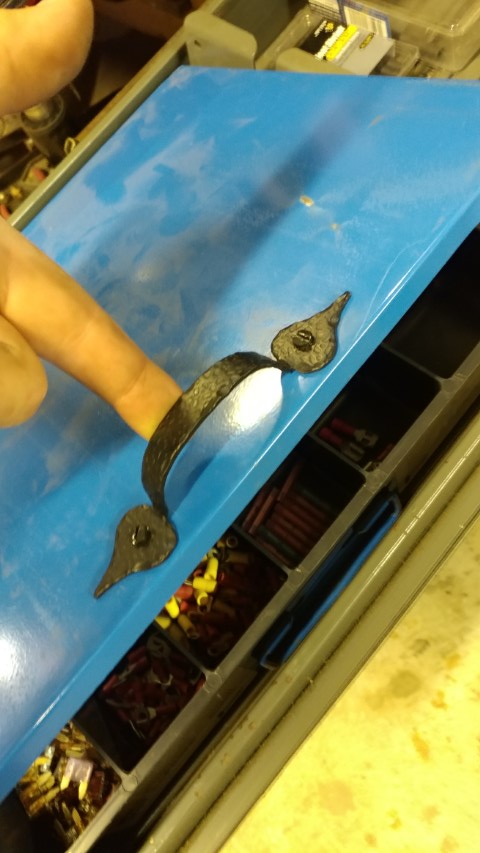
The lid on this organizer is a little hard to open when in the drawer so I added a handle.

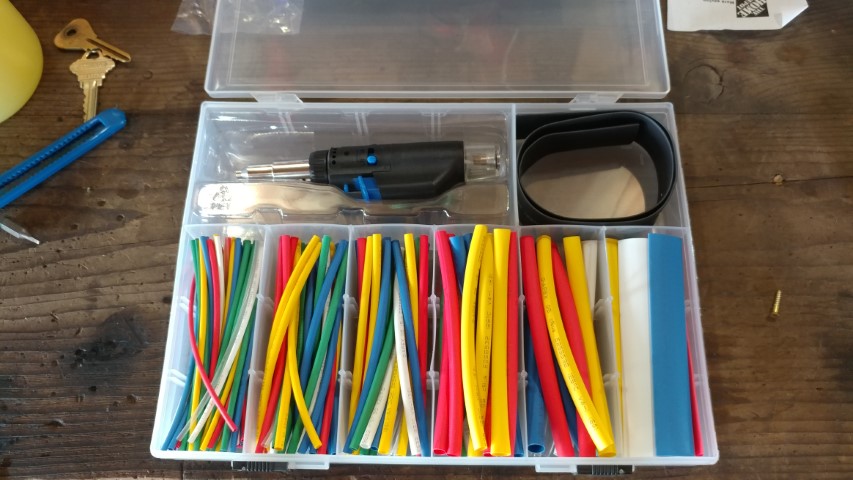
Here it is pretty much all full. Also picked up a heat-shrink kit from Princess Auto.


Update #4
Time for hardware organizing.
Looks like there’s enough room for 2 organizers in a drawer.

So I made a separator to prevent the top organizer from slipping into the bottom one. Just a simple piece of hardboard with some finger holes drilled into it.


Talk about close tolerances. Didn’t have much room after fitting 2 organizer trays in a drawer.
After making sure the trays fit I started filling the top one with 1/4″ and 5/16″ hardware. I also made some dividers out of leftover hardboard.


Update #5
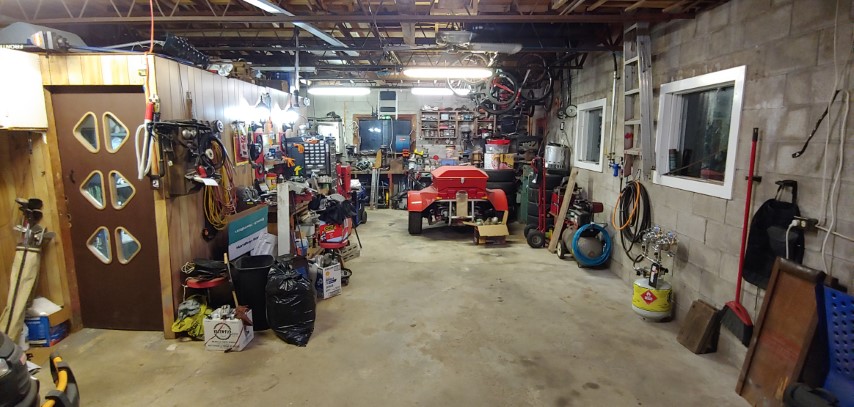
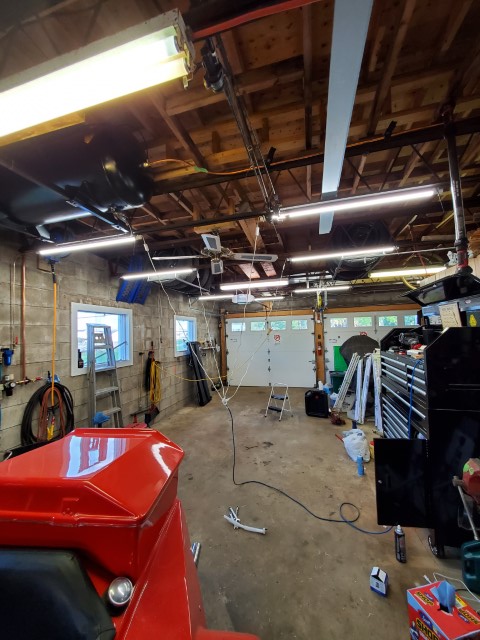
Just a little snapshot of the shop.


Update #6
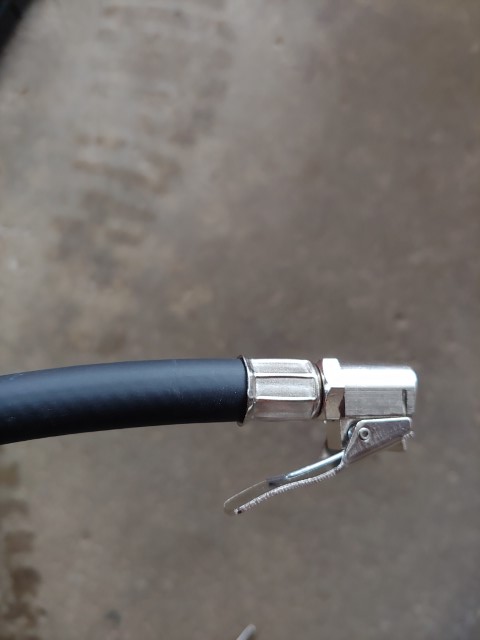
So I picked up a gas pressure washer from work. It was an old display model and being a display model all the accessories were either stolen or just plain lost. I agreed to purchase the pressure washer minus the cost of the missing accessories. So I nabbed myself a 2600psi Simonize pressure washer for $60+tax, not a bad deal. Naturally, I didn’t buy the accessories at work ‘cus they are way overpriced. I also replaced the line in on the thing because the stiff plastic is known to snap when being hit during normal transportation.


Update #7
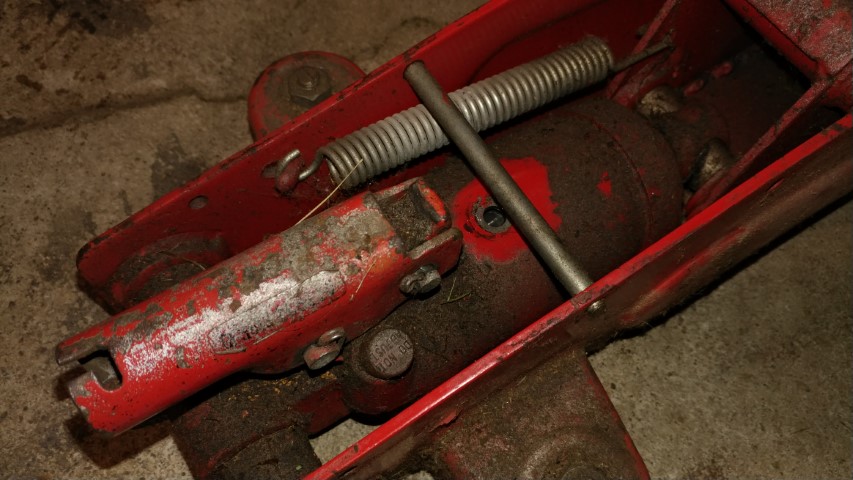
So I went to use the jack today and well it didn’t lift as high as I needed. Now, this is an old floor jack that my dad picked up used in a yard sale so naturally, its history is questionable. It actually always had a slight leak and I have never topped it up because it always worked for what I needed. Today I topped it up with some Rislone jack oil with stop leak. It was pretty simple, just pull the rubber plug out of the side of the jack cylinder fill it and then bleed any air by operating the jack without a load.


Update #8
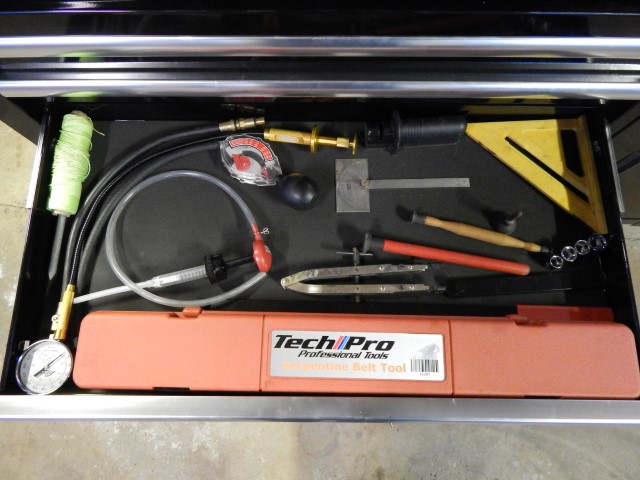
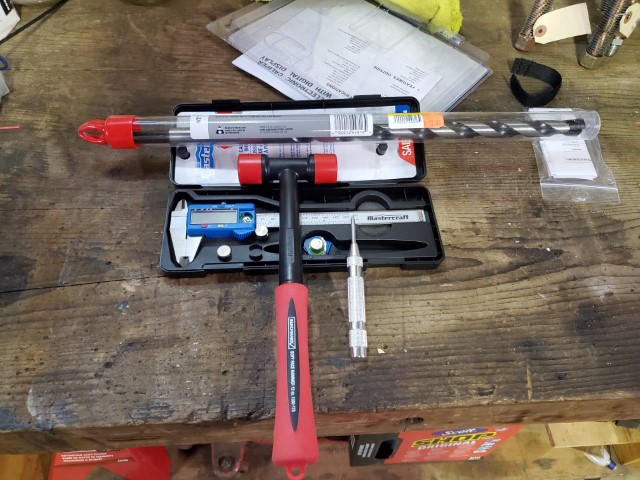
Picked up some more tools in the past few days so I’ll post ’em here with a small blurb. If you want a review of any of these tools let me know on my social media or through my contact page.
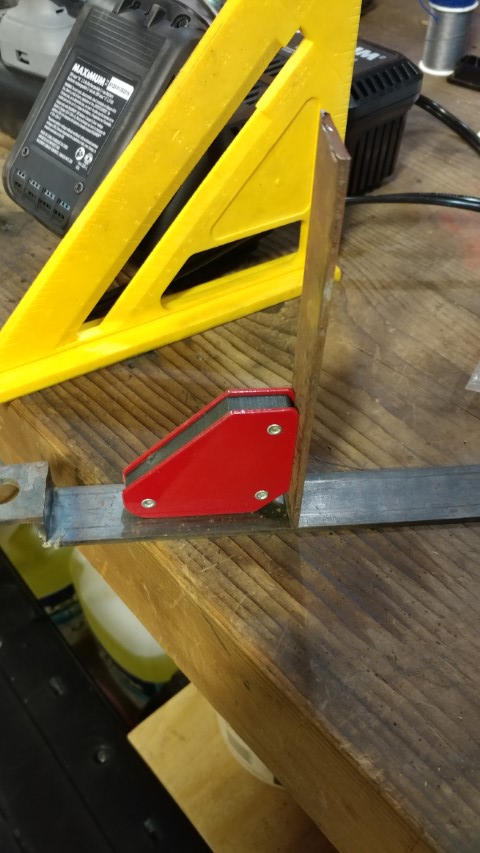
Doing enough welding that I should have a few welding magnets on hand.

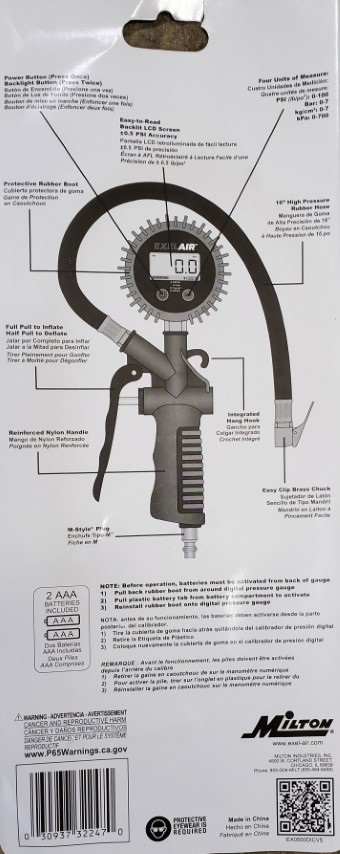
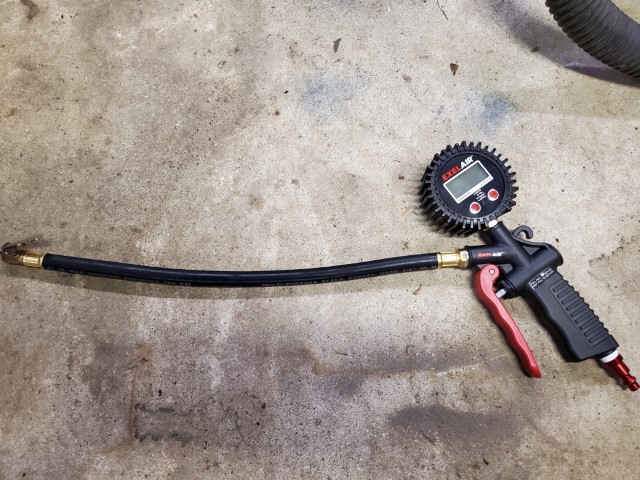
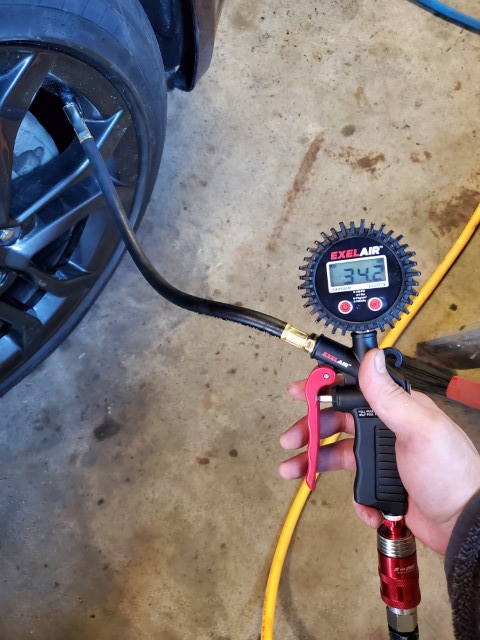
The new digital tire inflator, didn’t need it but it was a good deal and comes with a valve core tool.


Precision screwdriver set which might actually live in the office instead of in the garage.

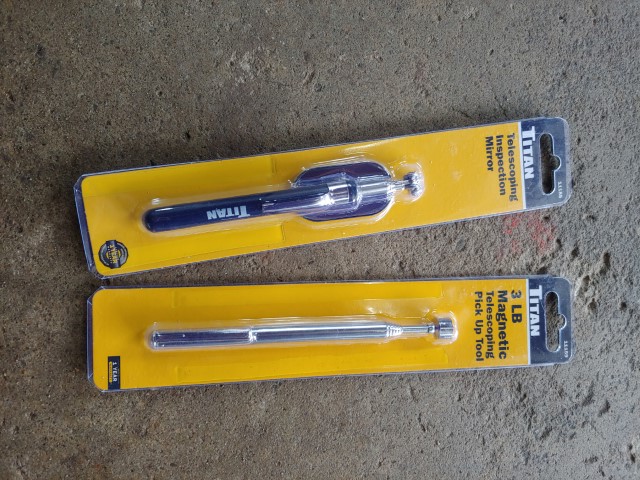
Been needing a new pickup tool and got an inspection mirror while I was at it.
Another good deal. Can never hurt to have more sockets.

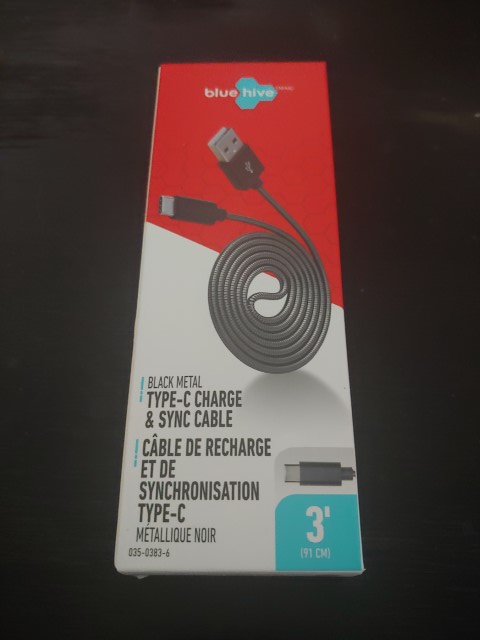
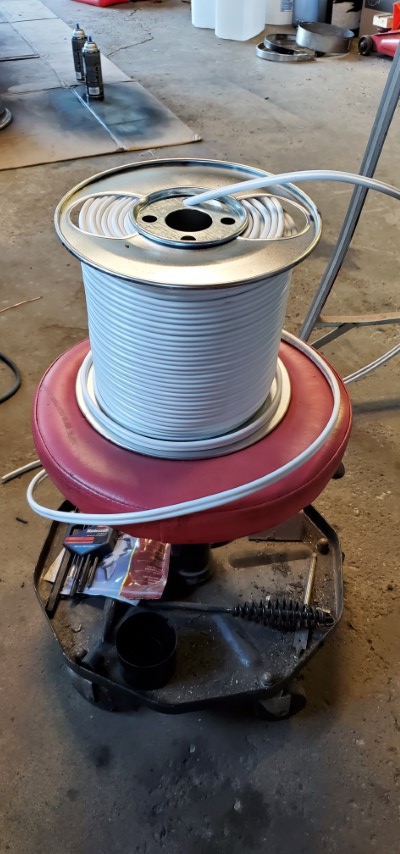
Picked up a metal-covered type-C cable hope it’s durable enough for use in the garage.


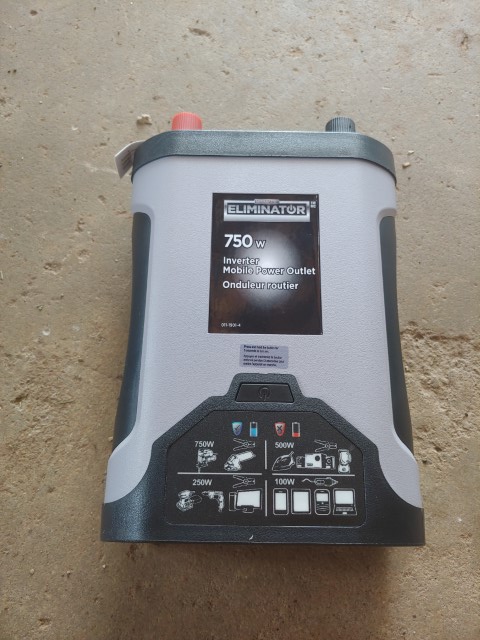
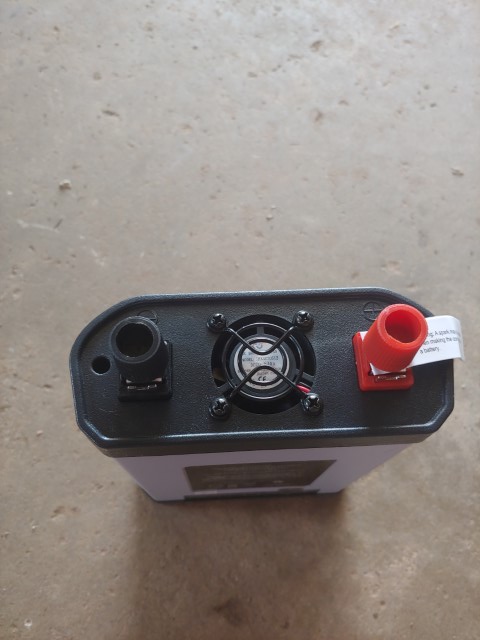
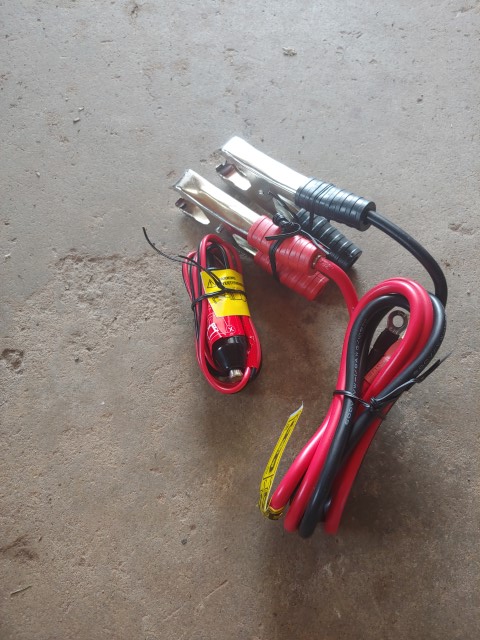
And finally, I picked up a 750W inverter to run a few things in the garage off the battery bank I have.


Update #9
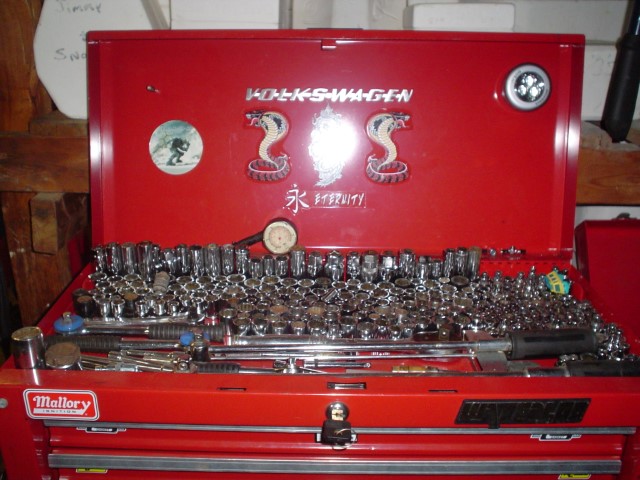
Someone the other day was asking me how I managed to fit all my wrenches into my toolbox well this is how. A piece of wainscoting with nails driven into it. Simple but effective.

Update #10
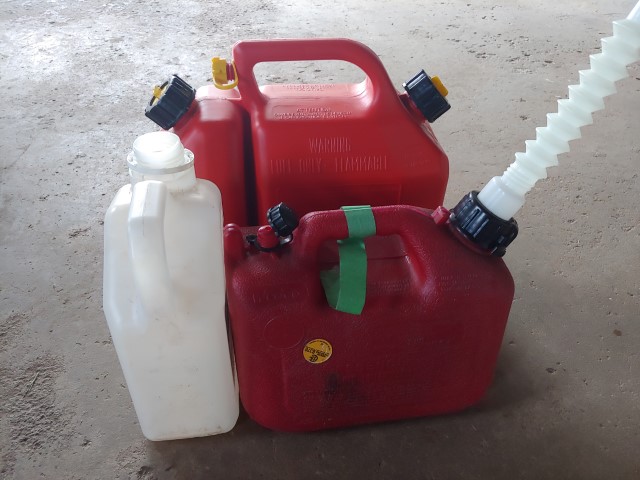
Picked up a fancy new jerry can for the chain saw so I can keep the bar oil and gas mix all in one container. It’s nice that I can just grab one container and go without having to think about it. I also took some shots of it beside the two containers it is replacing.


Update #11
Obviously, I want to turn this into my ultimate garage. So here are some in-progress pictures of it. Also before too many of you go ballistic about the gas containers, let me just tell you this is the best place for them. It is the furthest away from any possible sparks and right beside the garage doors where it is best ventilated to eliminate standing fumes. I will eventually either build a steel storage container or get a larger single portable container with a pump.

Update #12
Well I had to go to TSC and pick up a chimney thermometer for a wood stove. I figured while I was there I would walk around and browse what they had. I just happened to walk past something that caught my eye. It was something that I was contemplating purchasing for a while because my current one was quite inadequate.
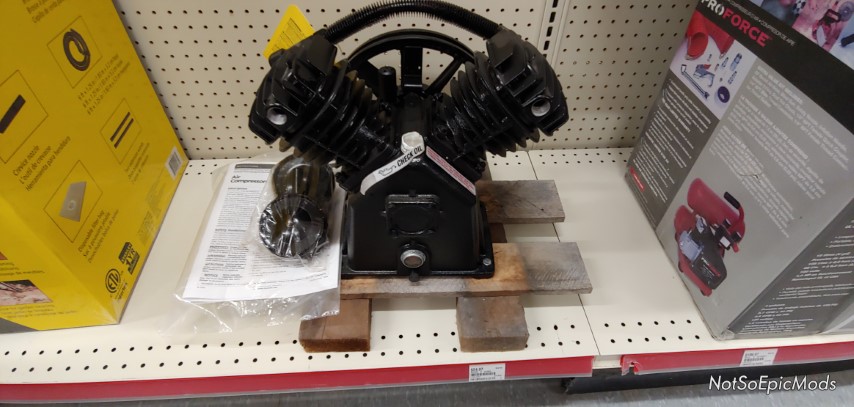
Yes! It is a compressor pump. My current compressor is a hodgepodge of a couple compressors and well it isn’t enough to even do 5 lug nuts on a tire without having to wait for it to build pressure. I’ve been holding off on purchasing one until this one. Can you see that price tag? Yeah, $54.97+tax is what I see too. I thought that the price was incorrect and was just going to leave it but I decided to ask the customer service desk anyways and they confirmed that yes the price is correct. Since it was going to be my birthday in a couple days I decided to buy it for myself.
Update #13
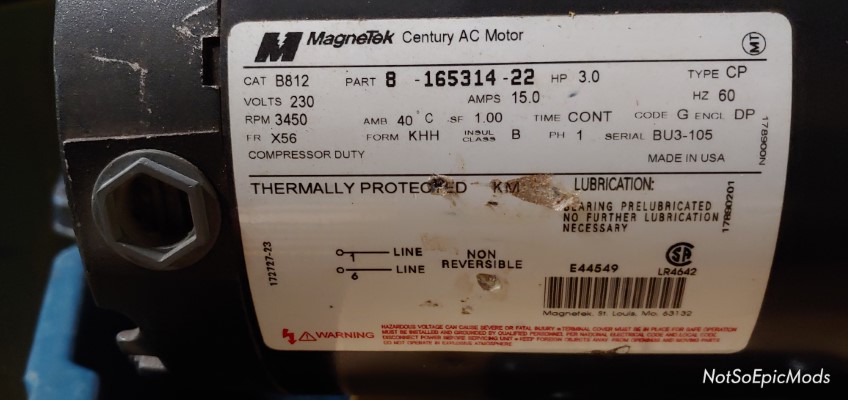
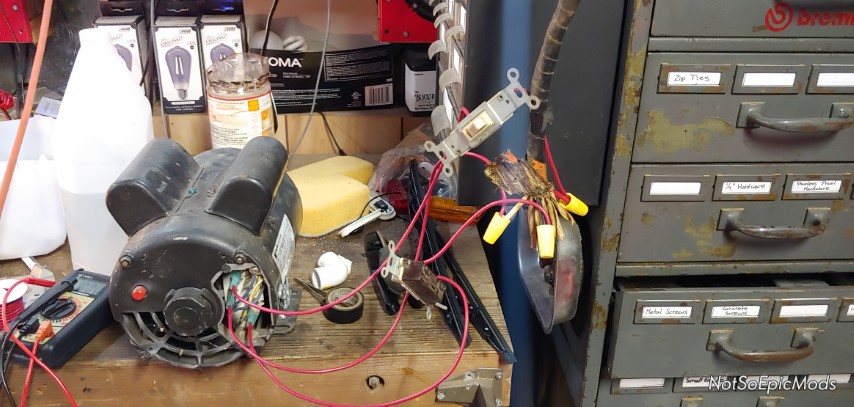
Well, my birthday came and passed and I got a used motor as a present. It’s pretty much exactly what I needed for a motor. I tested it and it seems to work fine.
Update #14
It’s like things just keep falling into place. Originally I was just going to use my dinky little 20gal tank with the new compressor but I decided to browse kijiji(a website people can post to buy and sell things) to see how much a bigger used tank would cost me. I know a new one would be around $400-$500 alone so when I happened to see an 80gal tank for $100 I jumped on it. I had a look at it and the interior seemed to only have minor surface rust from mainly just age. The tank also had an extended easy access drain so I know it was more than likely drained quite frequently. I was so excited that I only remembered to take a picture of the tank plate.

Update #15
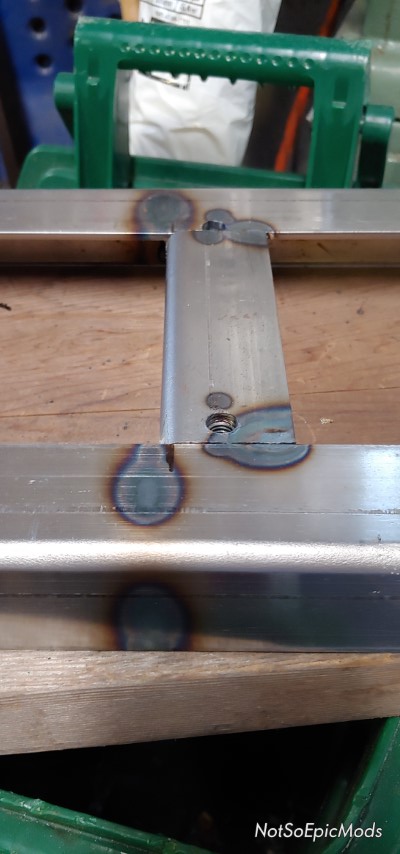
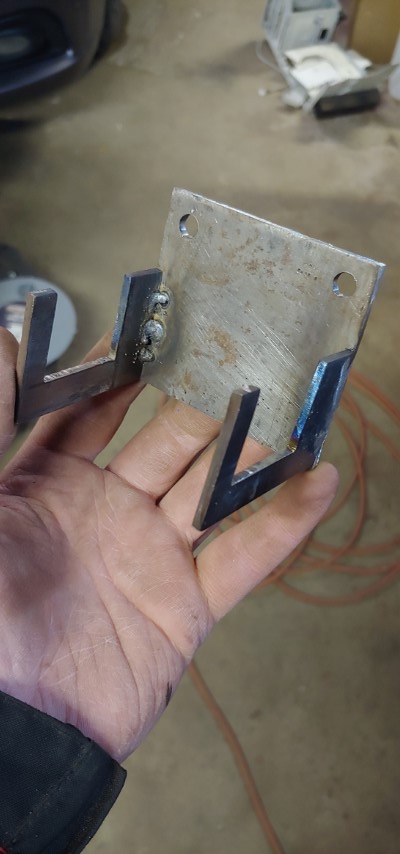
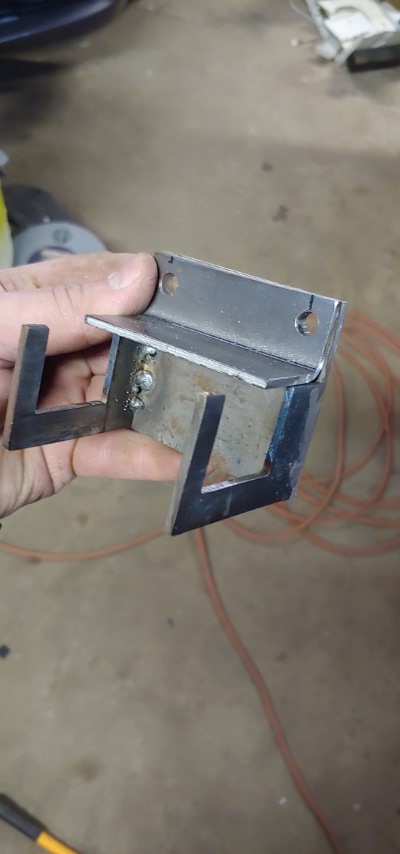
Well floor space in just about any garage is at a premium and while my garage isn’t exactly small I would also prefer to not have the 80gal horizontal tank on the floor. So my plan is to suspend the tank and compressor pump to the ceiling of the garage. First thing I will have to do is construct a base that the pump and motor can be mounted to. First I needed to plan out what distancing and size I would need for the motor and pump.


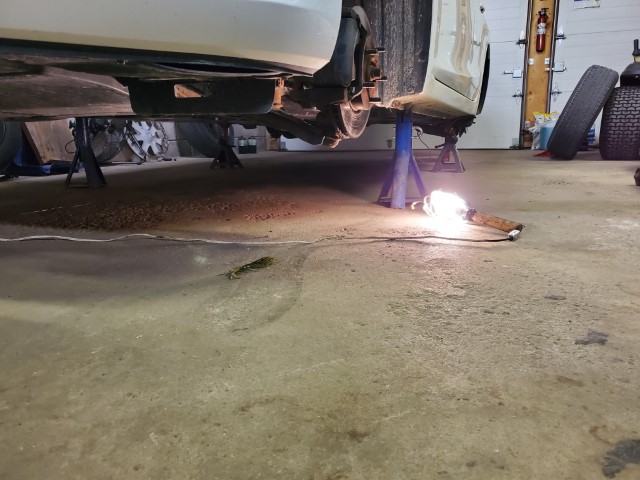
After sizing and cutting the angle iron it was time for me to practice my welding skills which I would classify as average. As you may also see is that I also included some welded nuts for the mounting positions.


Update #16
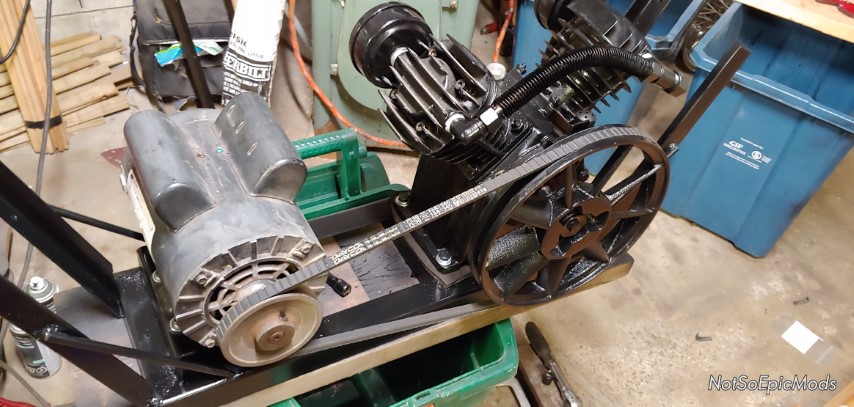
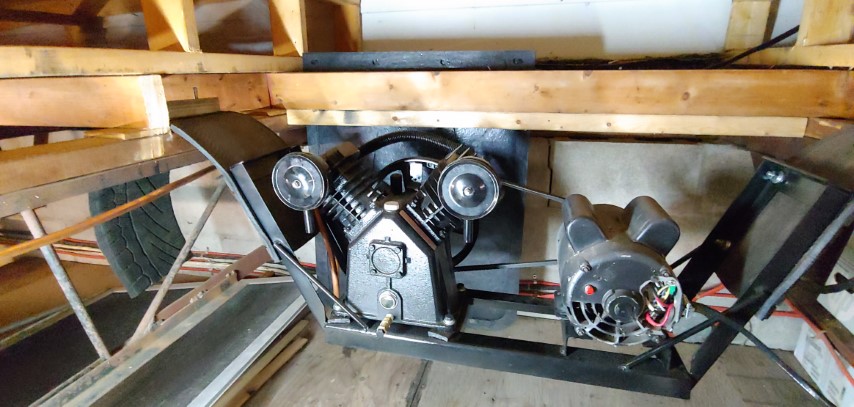
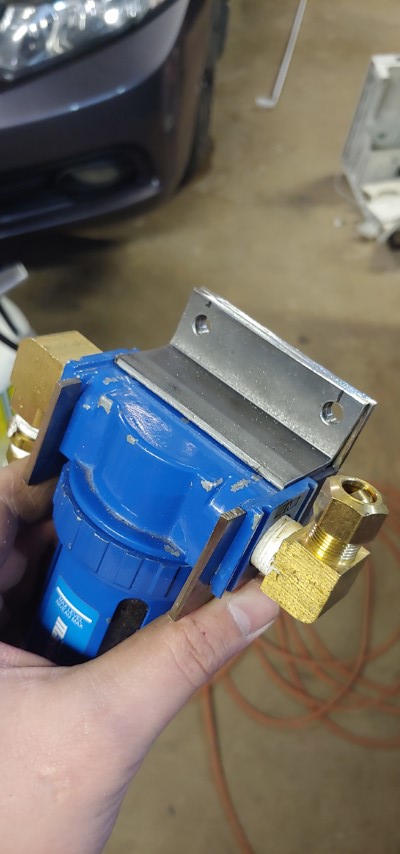
So after getting a coat of paint onto my bracket I started mounting the motor and pump. One little trick I like to use is taking a trigger clamp and using it in the spreader configuration to tension the belt properly.
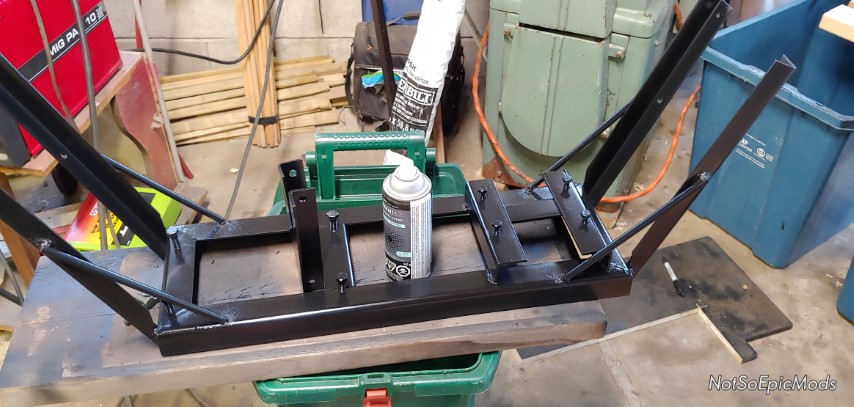

I got to say it looks pretty great even when it isn’t mounted in its final place yet. I also took a picture of information sticker on the side of the pump for future reference since I know someday I will need it and it will be worn off or damaged.

Update #17
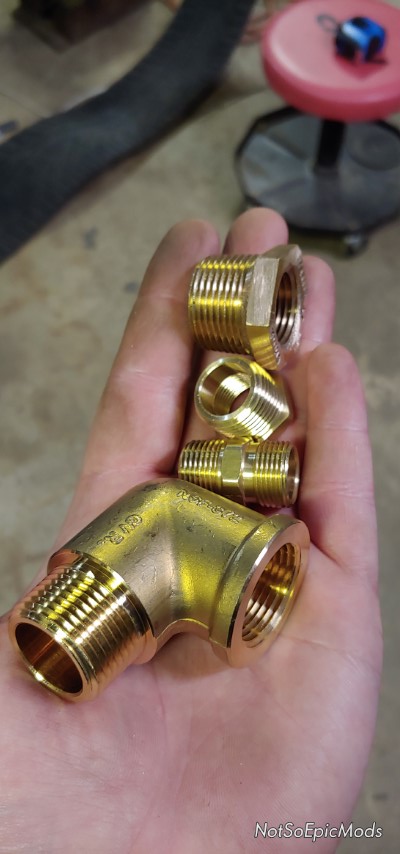
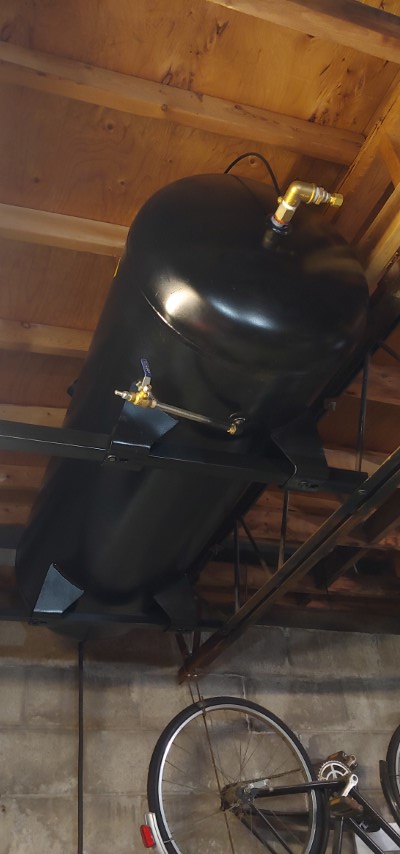
Since I got the compressor and pump all set up it was time for me to work on the tank. I had to buy some fittings since the tank only came with an overpressure valve and the drain valve. I probably went overboard going with all brass fittings for the inlet. I also went with a 3/4″ check valve to try and get as much flow as possible into the tank. I also painted the tank black so that is more easily blends into where I am putting it.


Update #18
I got pretty much everything set up and ready to mount to the ceiling trusses. Did I ever mention that this stuff is heavy? It was a struggle to get the pump/motor assembly up onto the top of the office room. I also had to find a way to get the tank up to where I wanted it. I decided to use my engine hoist to get it as high as possible then use ratchet straps for the rest of the way. Not the safest way of doing this but it’s the only way I have access to at the moment.


Update #19
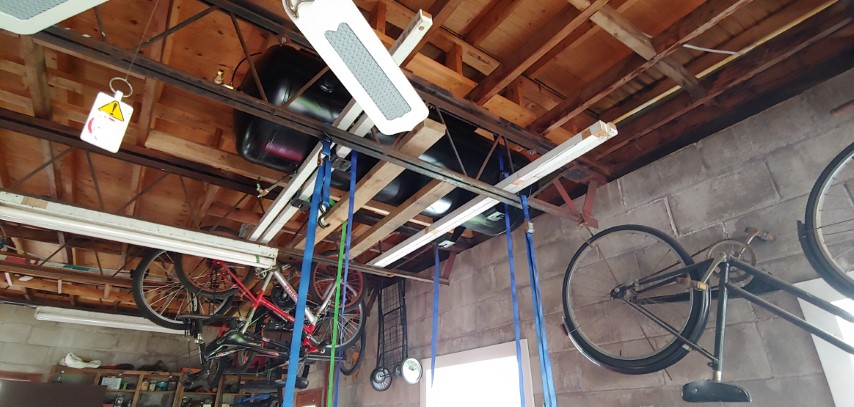
After getting the tank up into place I then had to mount the compressor/pump assembly. I plan to also suspend it from the trusses in the garage similarly to how I have the tank mounted. However, I plan on using some tire tread to suspend it. I figure it will give some vibration isolation and it has steel ply in the rubber to help with strength. I had originally planned on hanging it with heavy-duty springs but decided against it because the stability of the unit was extremely lacking. I built some brackets out of some angle iron and welded grippers onto them so that they have some bite into the rubber. I also put up some heavy-duty truck mud flaps to help isolate some noise since where I am putting it is the wall up against the house. I also finalized the mounting of the tank.


Update #20
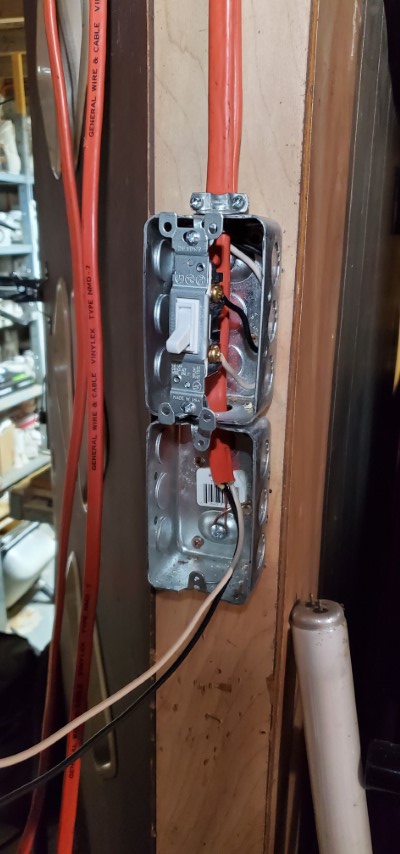
So I was kind of stuck trying to find a dual pole 220v 20A switch with a built-in pilot light. So I happened to come across a very low wattage(0.6w) night light LED bulb which I can use as a pilot light. So I got the electrical all set up and I even made a wood mount for the light. Is it to code? Probably not but most of the house isn’t to code either because of its age.


Update #21
Well, I got it all finished with the final 3/4″ flex line down to my main feed. I don’t see myself changing it all that much for the foreseeable future. It was a lot of work and I even did a video tour of it. I also have a short clip of me breaking in the compressor pump. You can kind of tell what the noise level will be while it’s in operation.
Update #22
So since I got the compressor setup completed I decided to work on adding a door onto the small room built into the garage. I plan on using this as an office area in the future as well as being able to store items where they are sensitive to freezing such as paints and cleaning chemicals. I simply made a video this time around so I’ll post it below.
Update #23
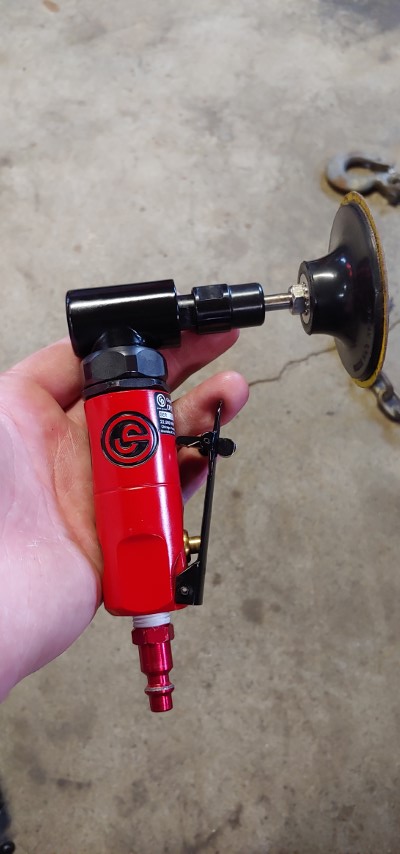
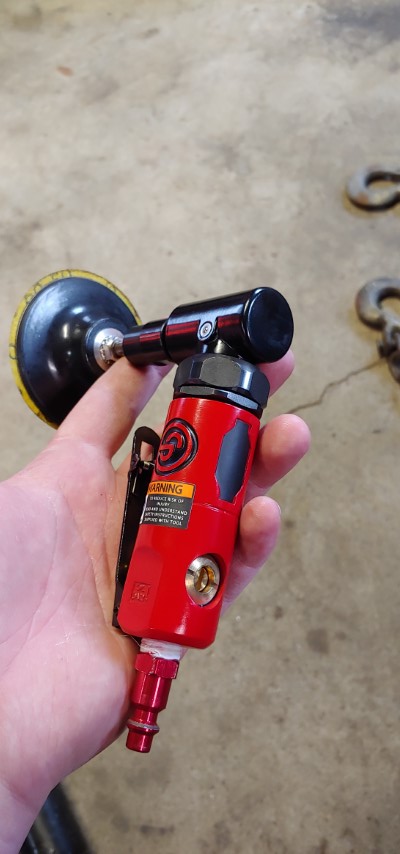
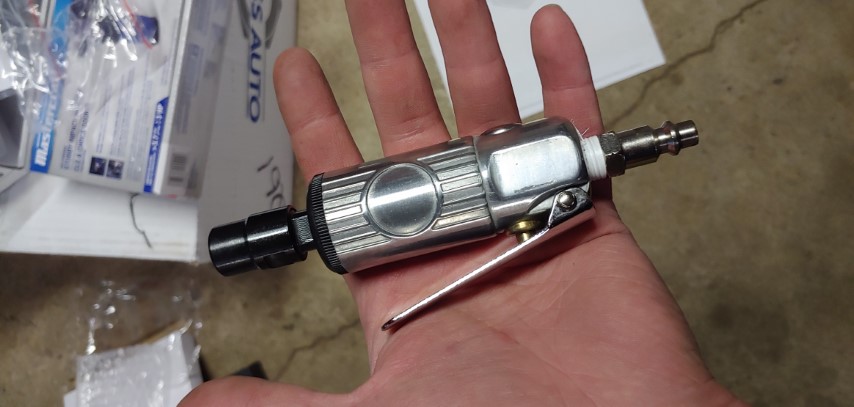
It’s been a little bit since I got my compressor up and running and I have started shopping around for air tools. First one I’m investing in is a 90 degree die grinder. I’ve been wanting one of these for quite a while now so I purchased one through work made by Chicago Pneumatic. I also got a larger 3″ twist lock adapter for sanding discs since my uncle has recently purchased a new trailer and wants me to clean up some of the rust on it.


Update #24
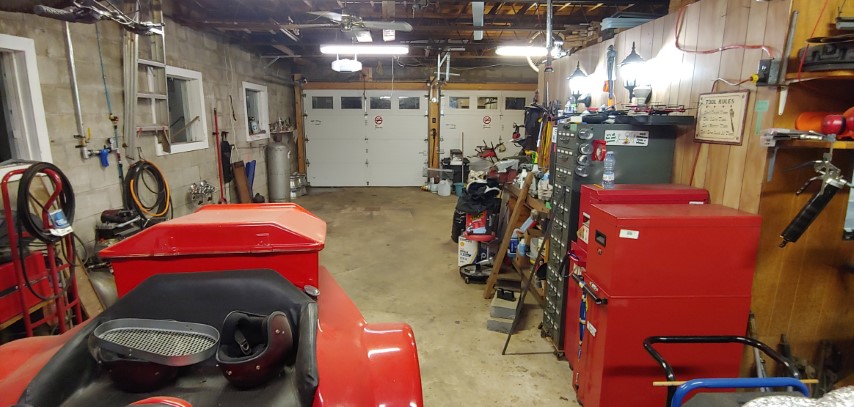
I decided to take a few quick in progress pics a few of them are a little blurry. The garage is somewhat clean but still needs a lot of work.


Update #25
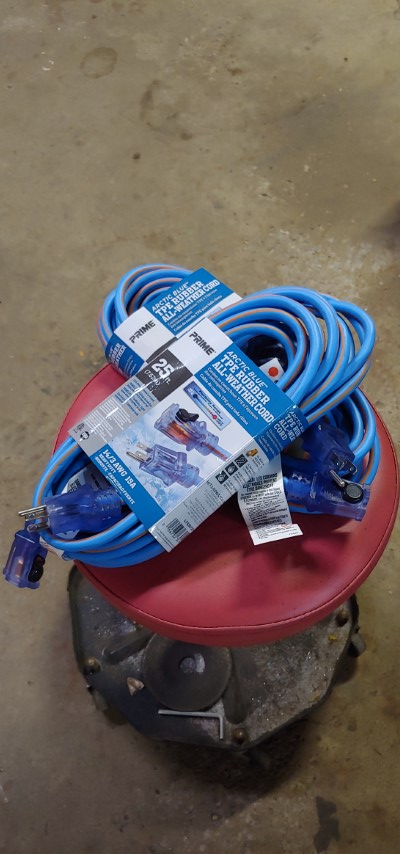
Well it’s winter here in Canada and since we now have two 4wd vehicles I no longer need to drive my Civic in the winter which literally takes forever to warm up since it burns so little fuel. The nice thing that the Ranger has is a block heater so I can make sure the engine will get up to operating temperature by the time I get to work on my 10 min commute. So I ended up getting myself a pair of locking block heater extension cords.
Update #26
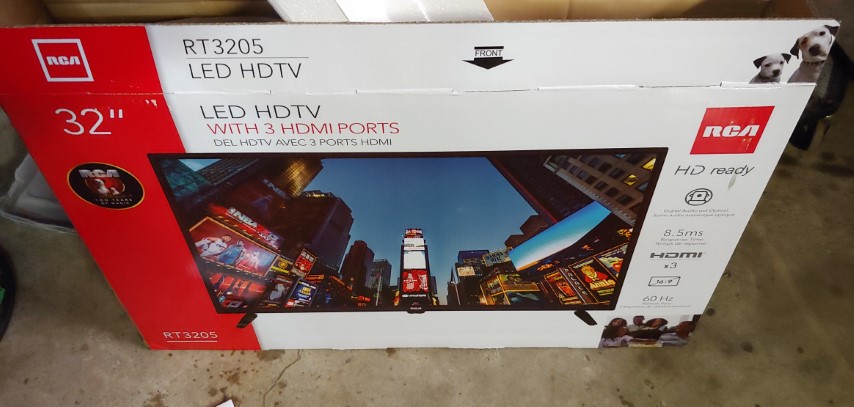
Hope everyone had good holidays! Yesterday was boxing day so an upgrade for the garage is a TV! Now it’s not huge but man was it cheap and that’s what I wanted. The last thing I need is to accidentally have something in the garage hit an expensive TV.
Update #27
A couple small updates. I think I’ve mentioned before that I want to put a sink in the garage mainly for washing hands. In order to prevent the pipes from freezing I was planning on using a lamp that was continually on. Luckily I happen to come across a 120V thermostat. Another thing is that one of air powered die grinders has died on me so I will be tearing that apart.

Update #28
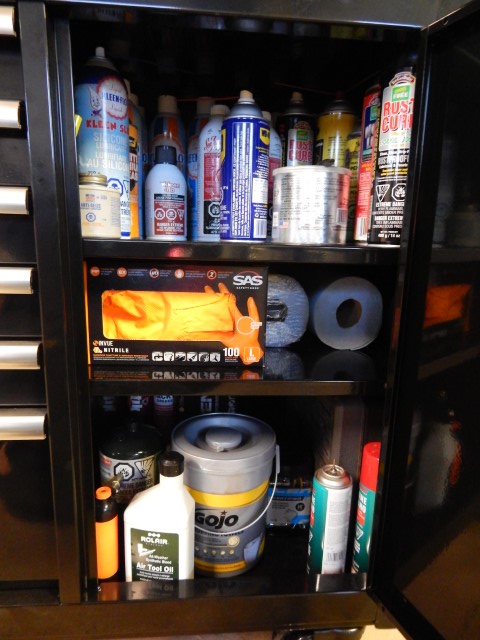
So it’s a few weeks into the new year and I am finally investing in some items for the garage. I got all sorts of goodies.
Aw man what a haul. I couldn’t get everything into this one pic. Everything I purchased was on sale and are items that I need or know I will use enough to get my money’s worth out of them.

As you may know, I purchased a TV a little while ago that I haven’t had the chance to install yet. However, part of that reason is that the computer I am going to connect it to is on the other side of a wall in the office part of the garage. So I purchased this Bluetooth keyboard and touchpad combo.

Another thing you may know is that one of my die grinders has acted up on me which I managed to fix since it was only a pin that came loose. I still decided to get a spare because it was so cheap.
I believe every garage/shop should have one of these and it’s a heat gun especially if you do any heatshrinking or worth with vinyl wrap.

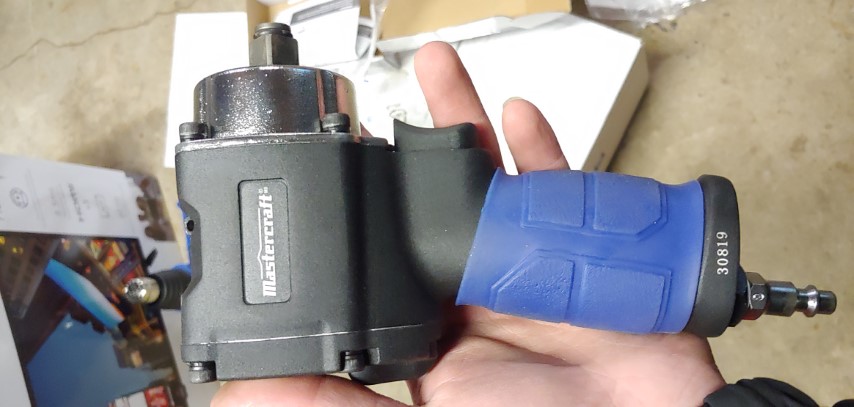
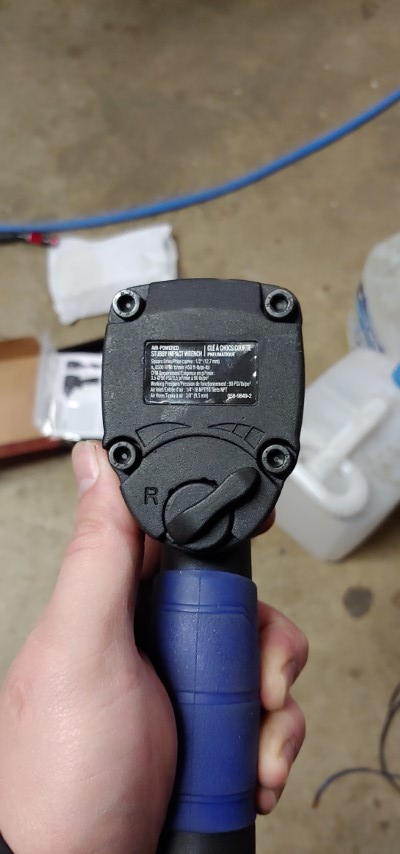
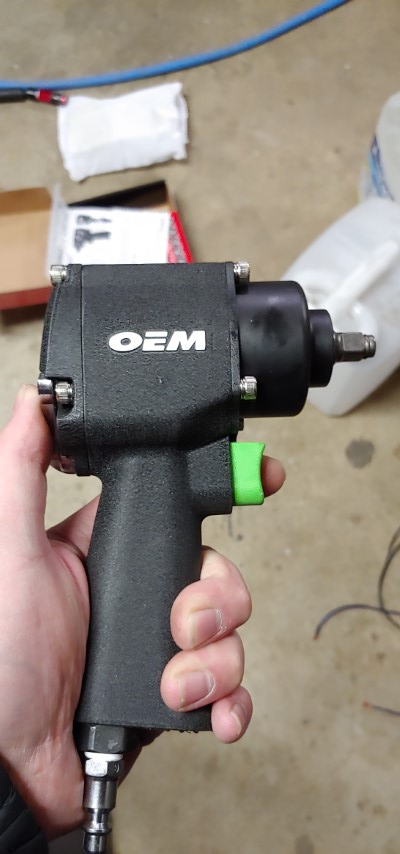
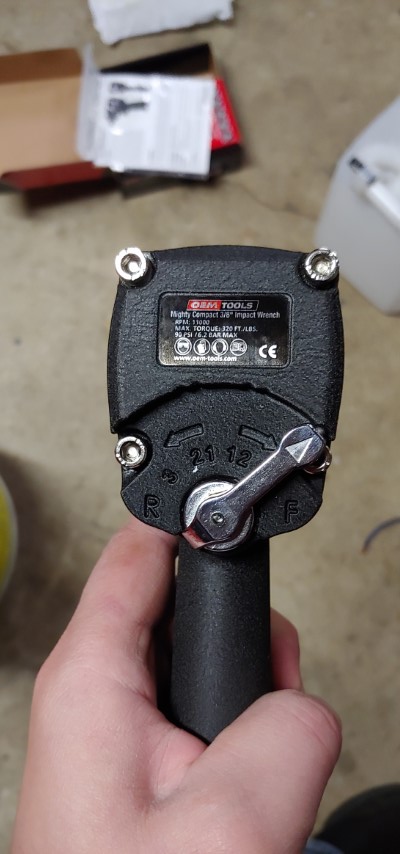
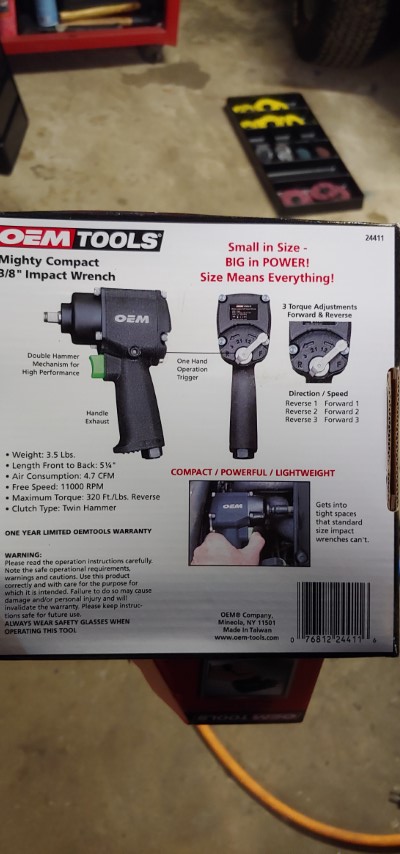
More tools! My old impact gun is really starting to get long in the tooth. It served me well but with several years of use in a garage at 150psi when it’s rated for 90psi I don’t blame it for being tired. Enter my new impact. It’s a stubby impact which some people don’t like. With this impact I’m not overly worried about longevity since I’m not working in a shop anymore. Also it has plenty of power for what I need since I don’t need to worry about over torqued wheel nuts anymore.


Since I was on the stubby impact track I thought why not get a 3/8″ drive one as well.


Last is a mechanic’s creeper. Since I don’t have access to a hoist at home and don’t currently have the ceiling height to accommodate one I will have to be working via floor jack and jack stands.

Update #29
Alright, so our “shed” out at the back has electricity going to it from the panel in the garage. With the “shed” being at the edge of the property it was already at the edge of the wifi range. So when adding walls to the equation the signal can get pretty spotty and unreliable. So I was tasked with getting reliable internet to the “shed” and to the smart tv that is hardwire only. There are a few ways I could do this and I settled on powerline ethernet.

The first iteration of the setup I had didn’t work so well with speeds and reliability being similar to the current wifi. Normally in a standard house the setup would have worked but mine went from a plug line that went about 25′ to the panel then from the panel about 250′ to a panel in the shed then another 10′ to the adapter. I wasn’t really expecting good performance but it really was sub par. So the only other thing I could do is try and make the connections between the 2 powerline adapters more direct.

The result is that I ended up cutting the main line to the “shed” and splicing in an outlet that was up out of the way so it was less likely to be used and this gives it a much more direct path out to the shed. As an added bonus I should be able to use additional adapters in the garage for hardwired devices without having to run additional ethernet cables.
Update #30
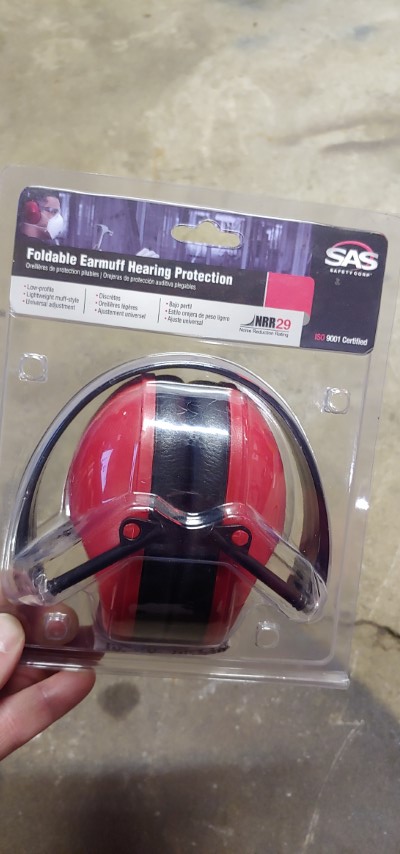
Getting a few more things for the garage. I’ve been running low on some hardware also picked up some wire wheels and a new set of earmuffs.


Update #31
Found an older video I made of when I started using an old filing cabinet for storage.
Update #32
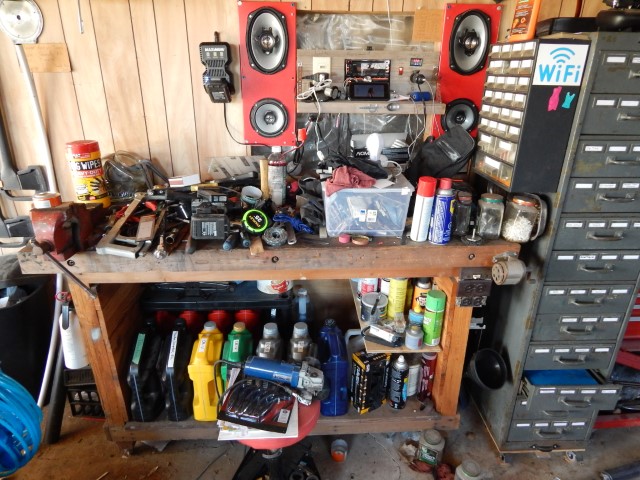
Some older pictures of when I was just doing some general cleaning up mainly on my workbench.


Update #33
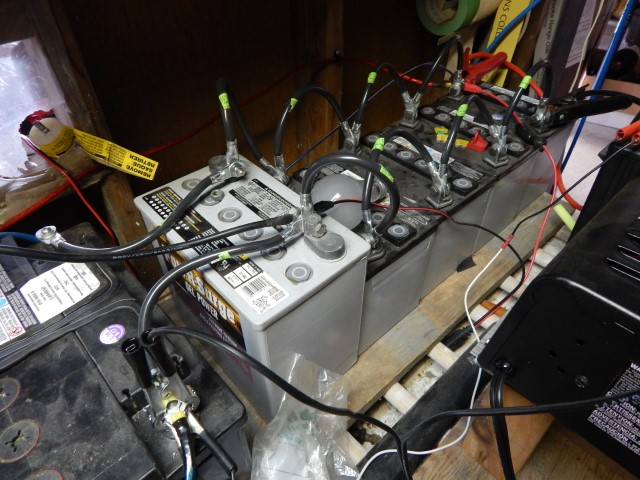
I thought I should post my battery bank since I was asked at work about it. Maybe I’ll do a dedicated page for off-grid stuff since I do want to upgrade the system in the future. Currently, I only have a 750W modified sine wave inverter which was actually a replacement for a 500W that died on me. The battery bank itself is a mish-mash of different batteries that I got from work that was on the skid slated for recycling.

Update #34
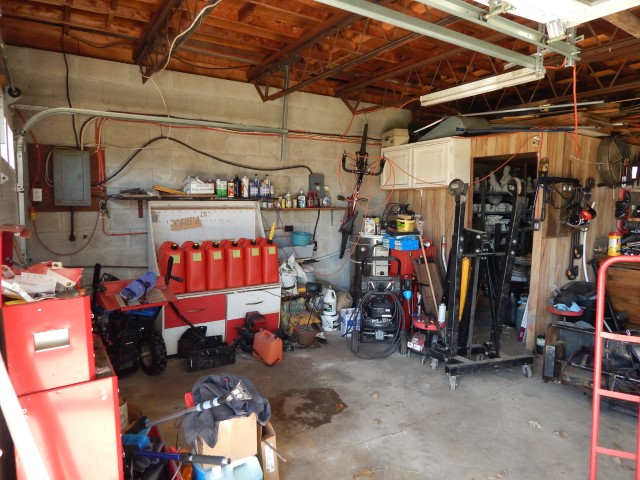
Some more old pictures I found, this will be a lead-up to a big upgrade for the garage for me.


Update #35
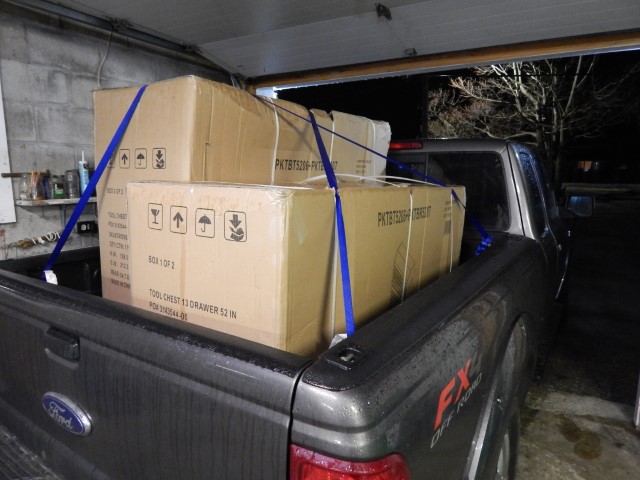
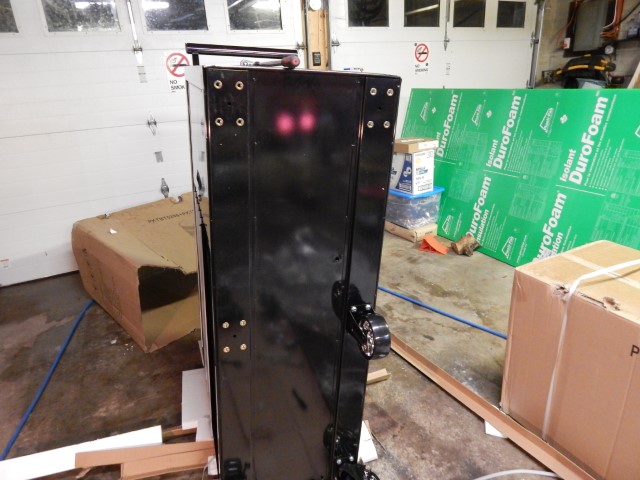
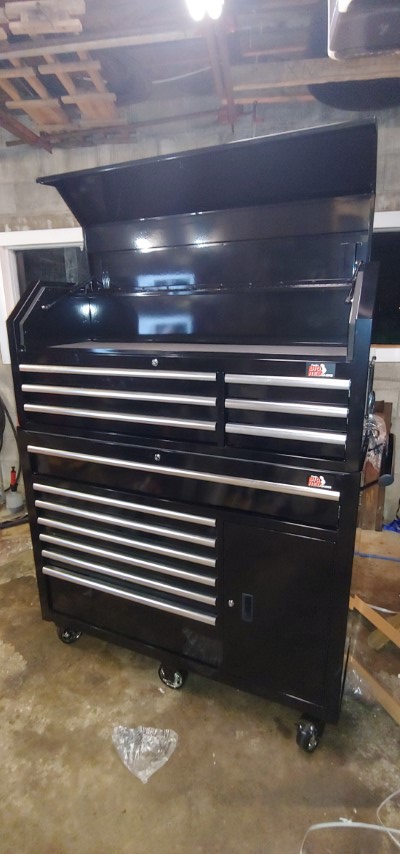
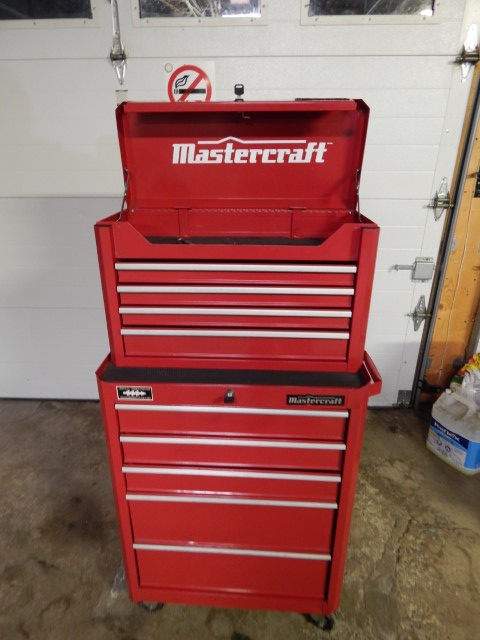
Well, here it is. After getting frustrated looking for tools between my 2 toolboxes while fixing the truck I decided to look for a toolbox. There was one on sale at TSC(apparently changing to Peavy Mart?) it was a 42″ for some reason I decided to wait and use my next paycheck to pay for the toolbox instead of using any savings. Well, it was a good thing I waited because when I was checking online if my local store still had the toolbox in stock I saw a 52″ version on sale for only $100 more. I found a store that was about a 40 min drive away that had one in stock and asked them if they would hold it for me until I got off work early the next day.
I managed to get down there and it just barely fit in the truck but man I was happy I got it because the next day it was no longer on sale.

Update #36
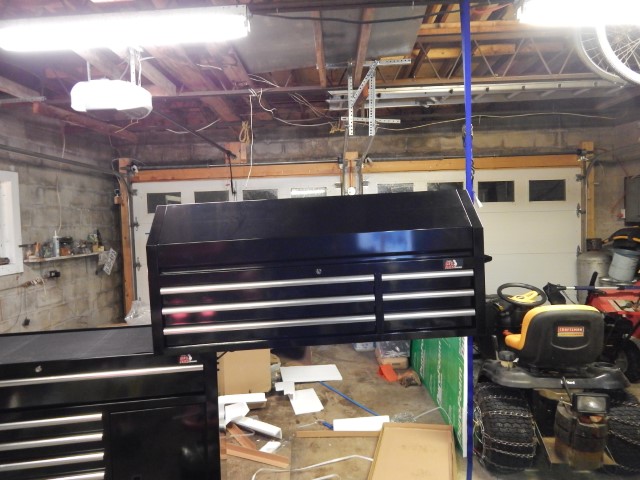
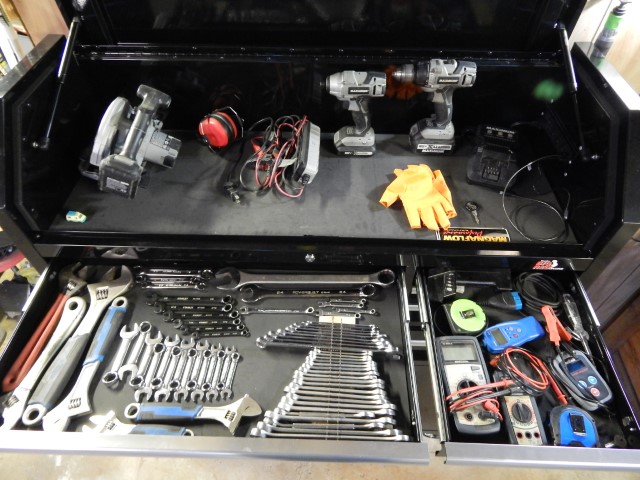
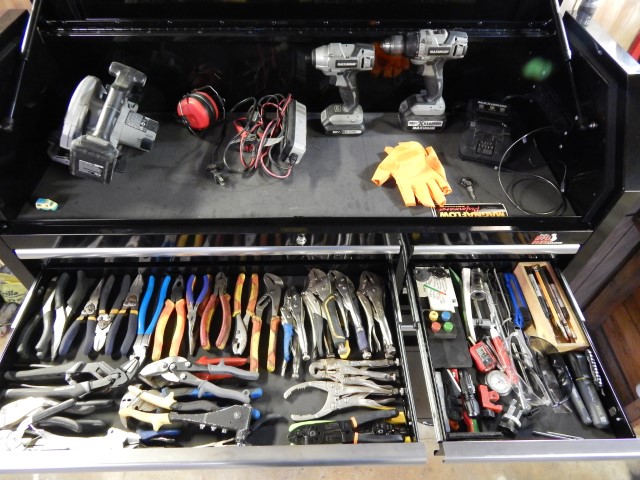
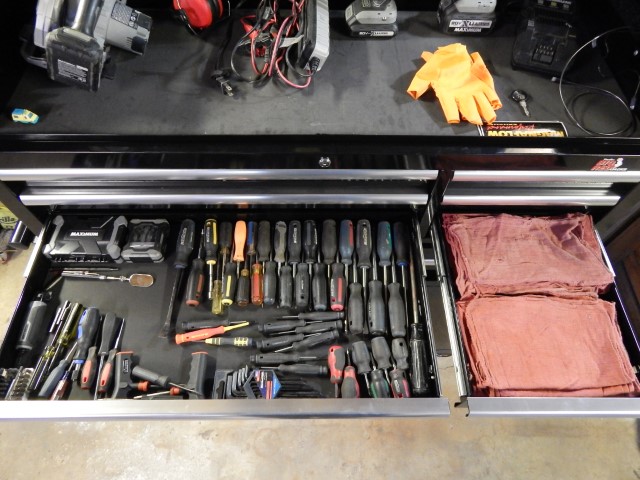
Been so excited about the new toolbox I stayed up a little late filling it up with my tools. Tons of space and takes all the tools from my two smaller toolboxes. I also ended up moving my workbench to make space for this new toolbox.


Update #37
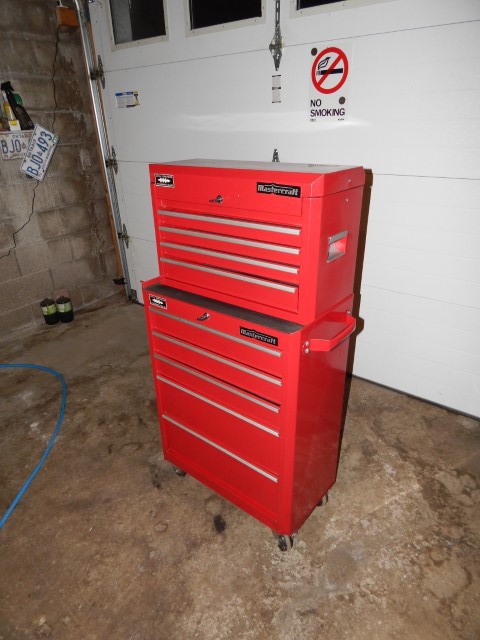
Well, now that I have the new toolbox all set up I have too many toolboxes. I originally had 3 so now with the new one I have 4 which is way too many. I guess it’s time to say goodbye to one of them. The one that’s going is my trusty 24″ Mastercraft toolbox. It has served me well for several years when I worked at Canadian Tire.
Update: Sold to a local. Makes me happy that it’s nearby. Is it weird being sentimental about stuff like this?

Update #38
Well, now that I have the space it’s time to get a few more tools. Obviously, I only got items on sale and any things that I will actually use at some point.
First up is a new grease gun and synthetic grease I got from work.


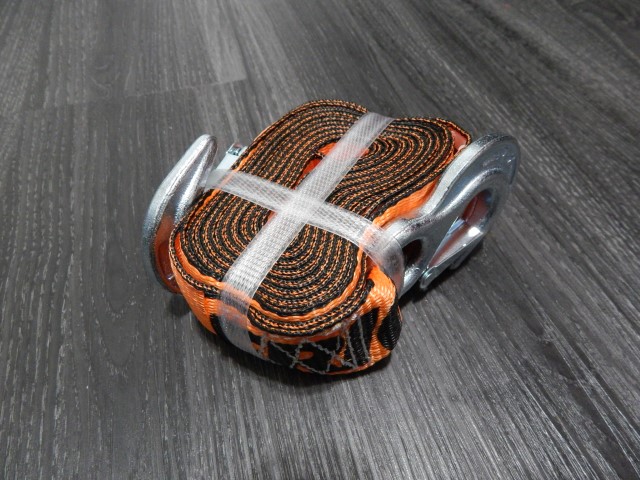
It’s not really a tool and not even really for the shop but I do feel that it would be good to have a tow strap in the Ranger. Also, it was cheap.

I’m not sure what happened to all my hole saws but I can’t find a complete set of them. These aren’t bi-metal but neither are any of the ones I currently have.


So this is a bit more of an impulse buy. Gravity-fed paint spray gun for $9? Yes please. It’s not big but will work great for when I need to do touch-ups or small items where I can’t use aerosol cans.


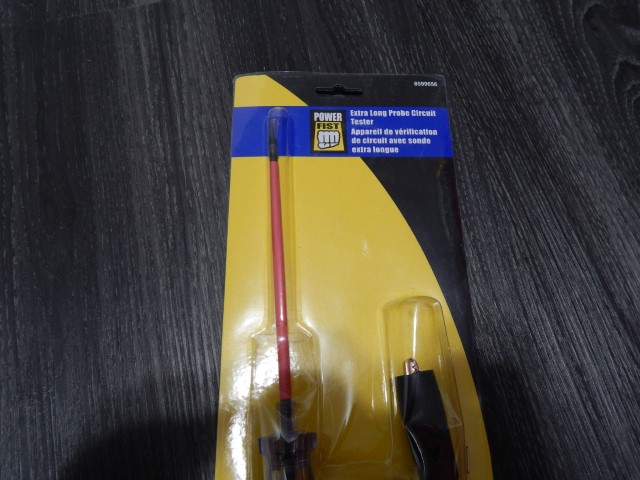
I already have 1 or 2 or maybe even 3 test lights but something I ran into a little while ago is that the ones I have don’t have a very long reach if I needed to get into an area on a vehicle with little room around it but it was far to get to.

One thing I don’t have but would like to have and can see myself using is a good set of pin punches.


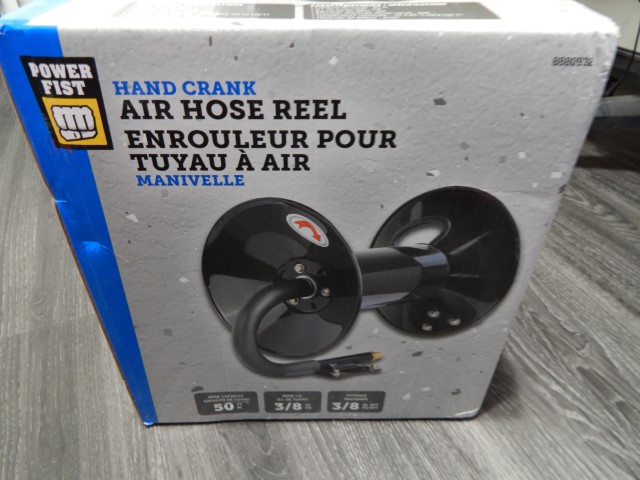
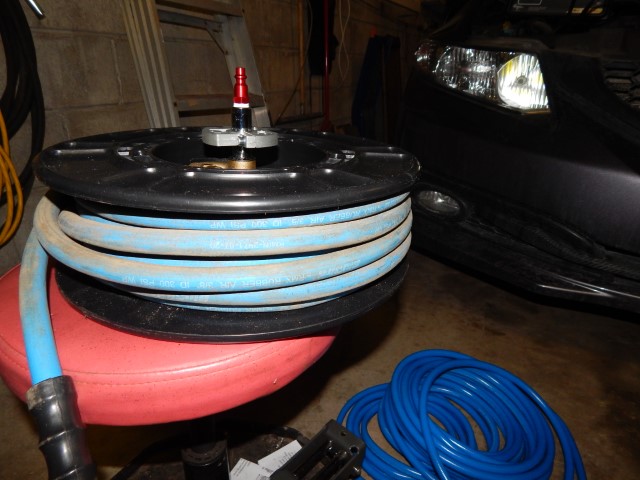
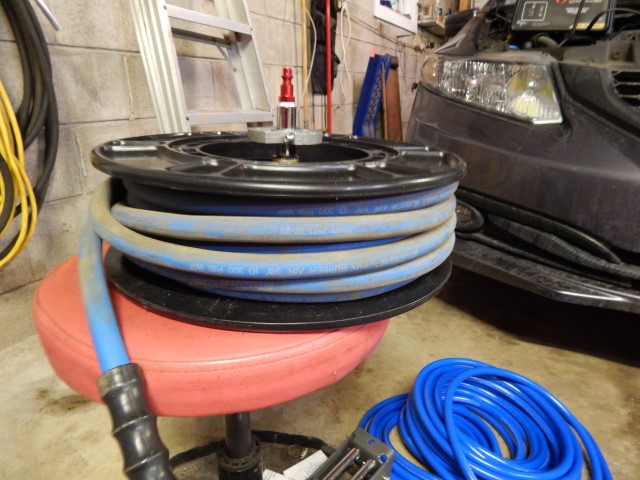
Last but not least is a hose reel for my 50ft air hose. Been getting a little tired of manually looping up the hose. The only thing is this is a lot larger than I thought and I’m not sure where it would be convenient for me to mount.
Update #39
Well, I’m back at it again with more tools for the garage. First off the quick things, I got a small LED motion light bar for the new toolbox.


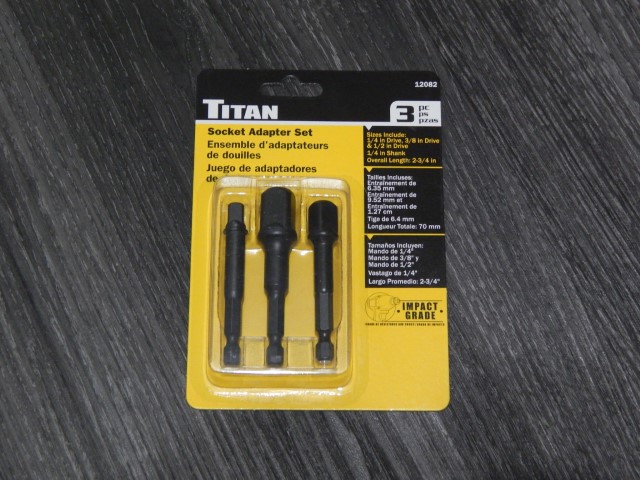
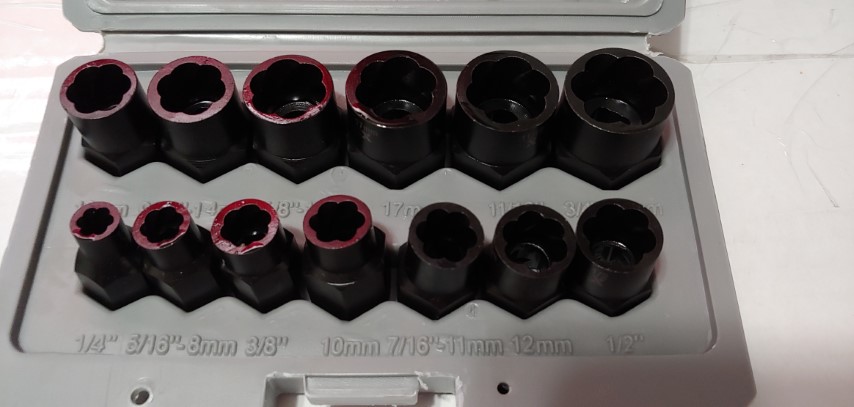
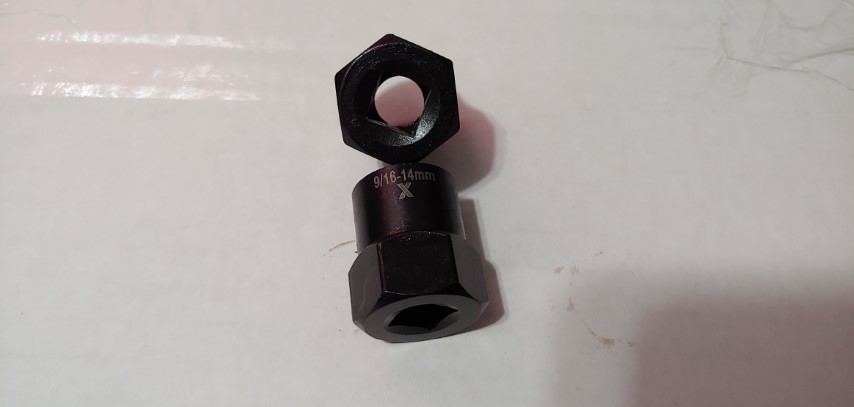
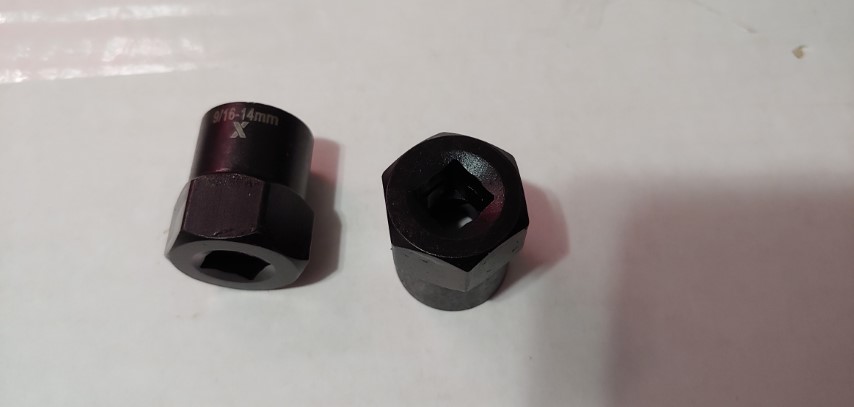
I also finally got all 3 common sizes of impact socket adapters.
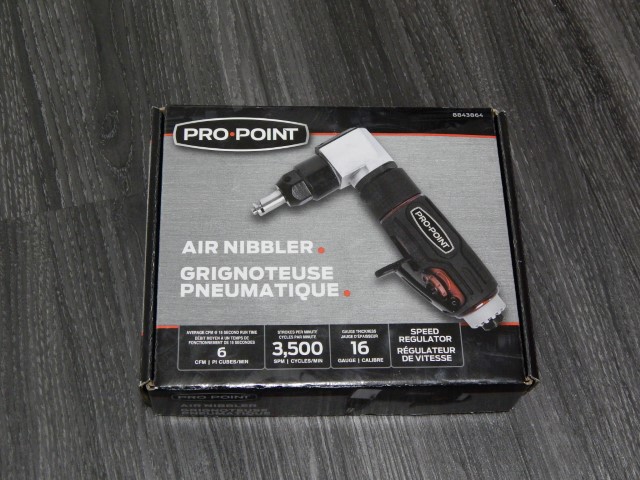
I occasionally need to cut something out of sheet metal and I don’t have a good way of doing more complex shapes. Hoping this air nibbler will make things a lot easier.


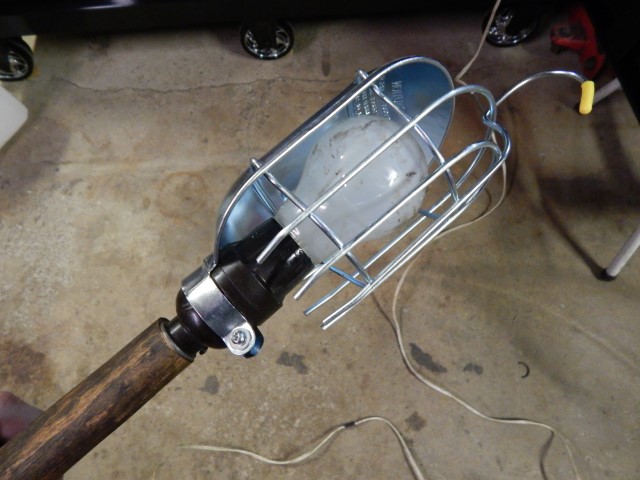
I also got a trouble light cage from work for my homemade trouble light.

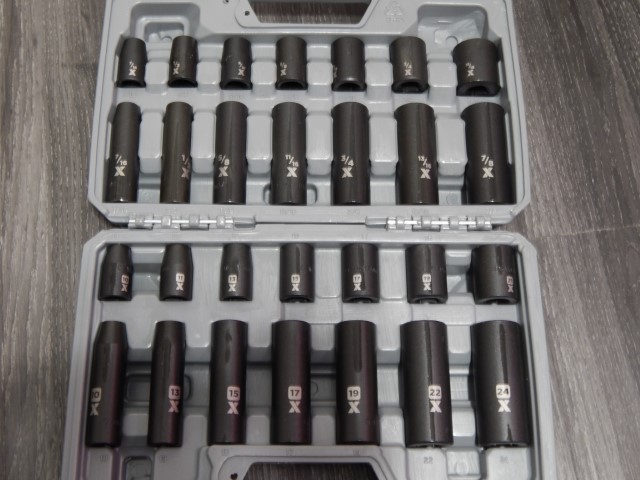
Would you be surprised I’ve never owned a set of impact sockets?

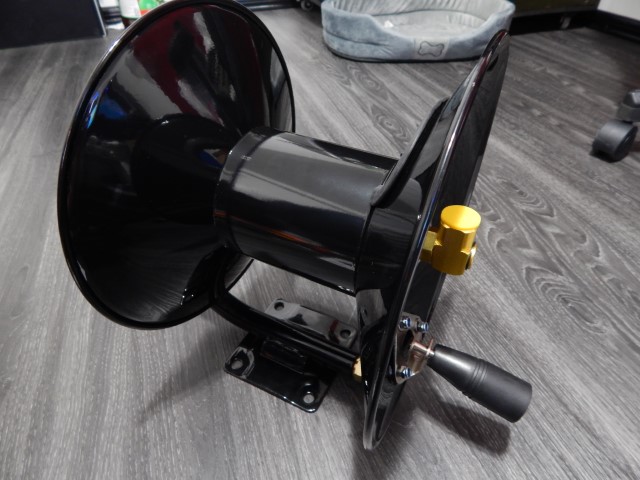
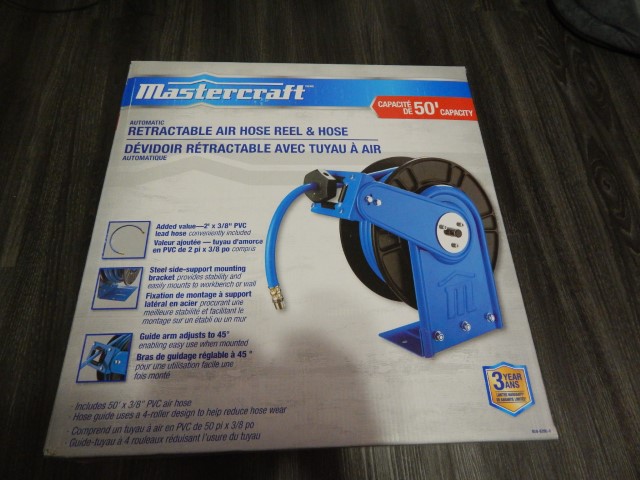
Now onto the main attraction. This here is a 50′ auto-retracting reel. After my earlier post of the manual hand crank hose reel I’ve decided to return it. The main problem with that one is that it sticks out quite a lot and with my narrow garage workspace I believe it would be more of a hindrance than a convenience. I’ll list a few pros and cons below of this one.
Pros:
- It’s relatively cheap
- It has a smaller footprint than most other reels and is automatic allowing for ceiling mounting
- Can handle 50′ of 3/8″ air hose
- Has a good amount of adjustability
- The base can be removed for easier mounting
Cons:
- It’s cheap, so I’m not sure how long it will last but it has a 3yr warranty
- It’s smaller than other reels so if the hose doesn’t wind nicely it can eventually get too large for the reel
- The air fittings on it are 1/4″ even though it can handle 3/8″ hose(not too much restriction but would still be nice to have 3/8″ fittings)
- The air hose that comes with it is PVC and smells really bad(chemical smell) like I mean do not mount this in a place that doesn’t get decent air flow
- The supplied air hose can be quite stiff in the winter months if the space it not heated
With that out of the way, I have this really nice 3/8″ air hose I purchased earlier that I will use on this reel.
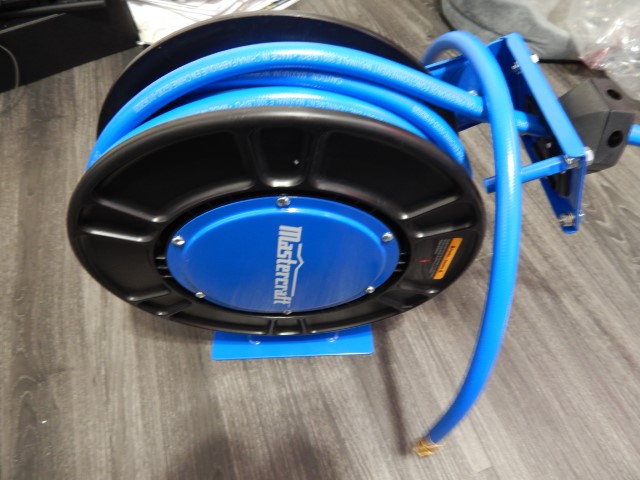
As you can see below there isn’t much space in the fitting area inside the reel. But bonus it looks serviceable if the rotating part ever leaks.


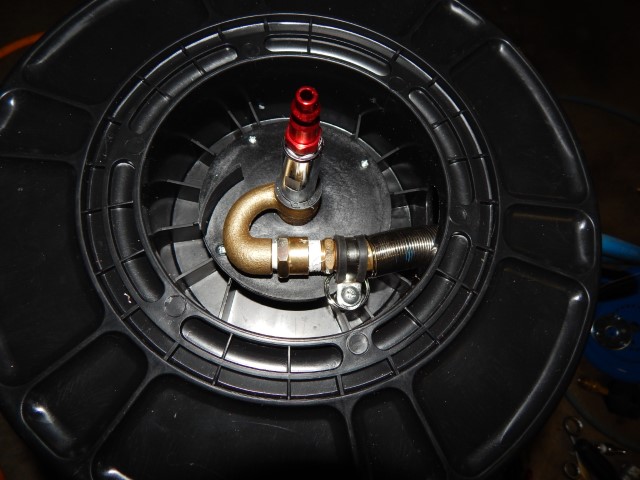


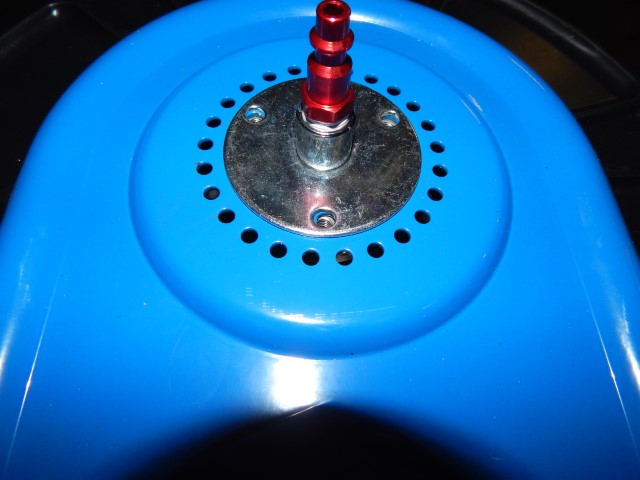
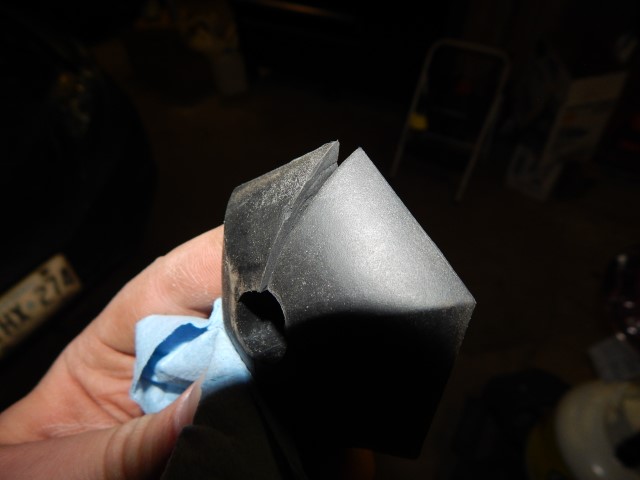
I also had to cut the stopper block as the rubber part was going to be too hard to slide onto the hose if I wanted to keep the rubber end protector on it.


Well, I got pretty tired and didn’t take any more pictures but you can see the final mounted reel in a video I will post on my youtube.
Update #40
Here’s a vid clip of the hose reel mounted and a quick compressor tour. Unfortunately, the audio got a little corrupted halfway through.
Update #41
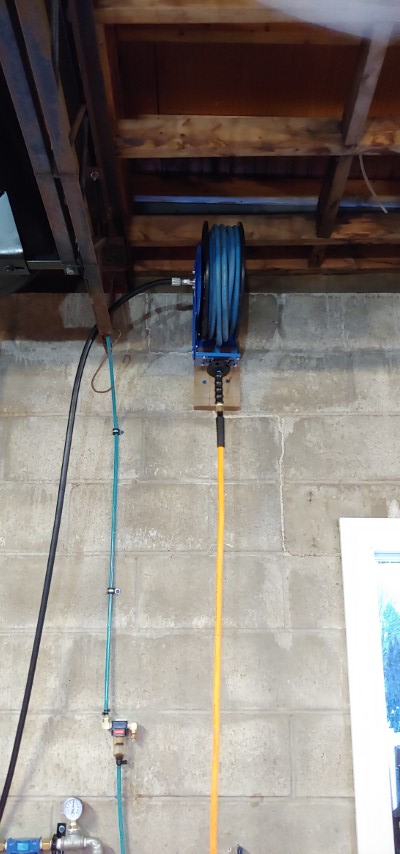
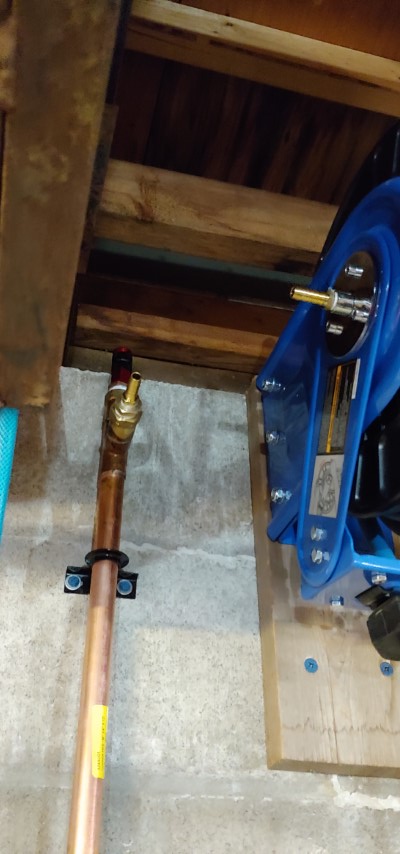
After getting the hose reel up I can now focus on other problems with my compressor setup. I bought some more items to help with this along with another hose reel cus why not.

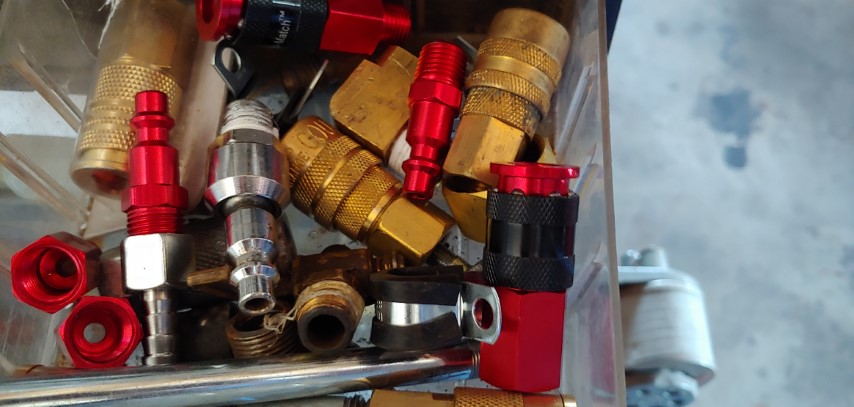
I’ll also be using some fittings from my compressed air-fitting stash.
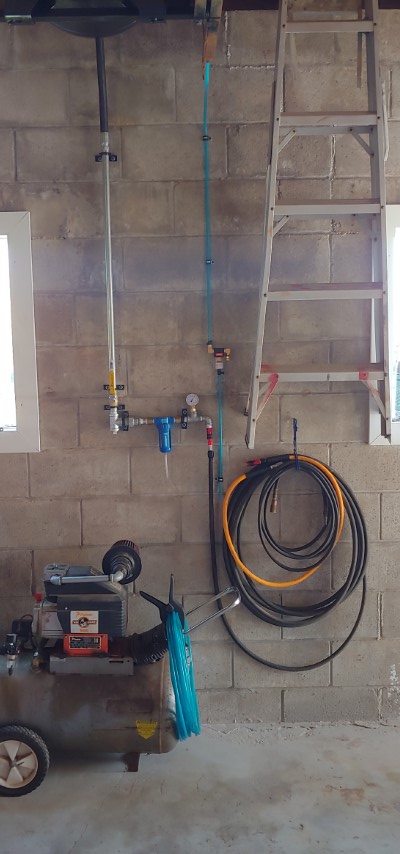
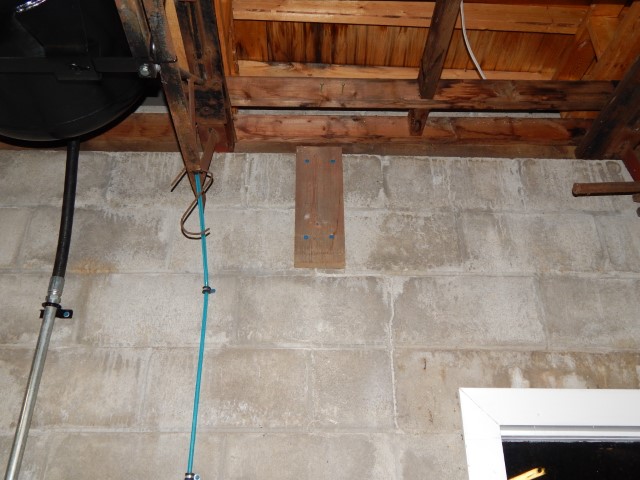
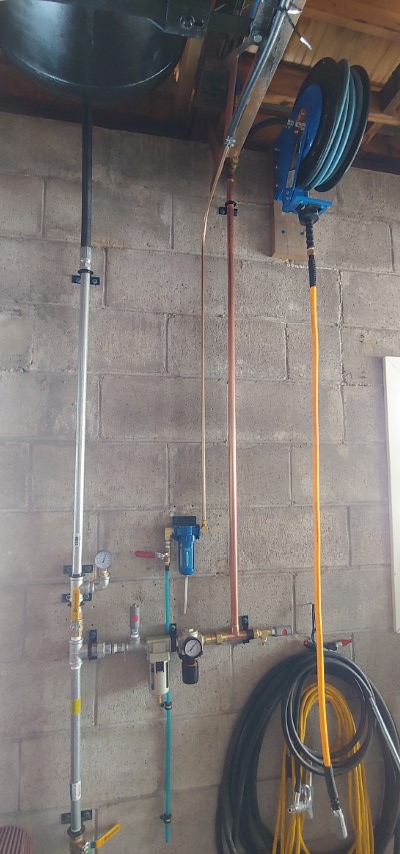
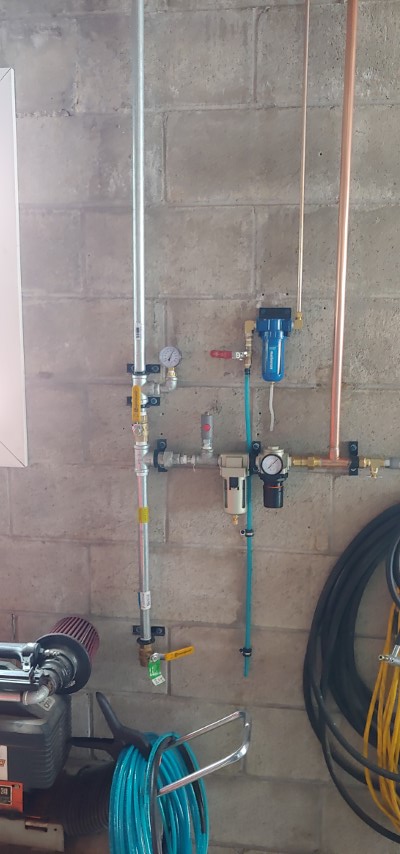
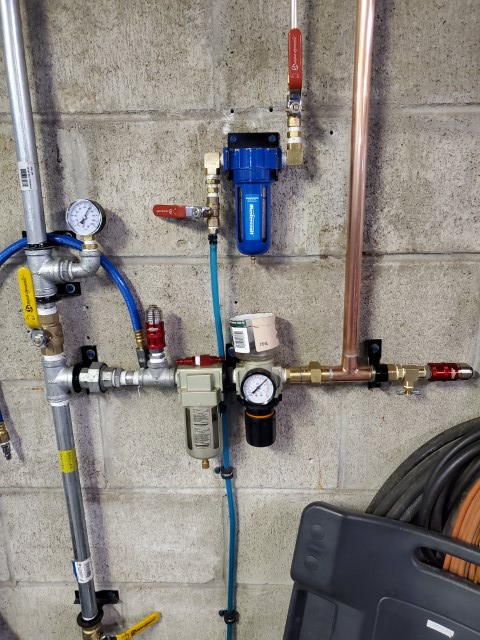
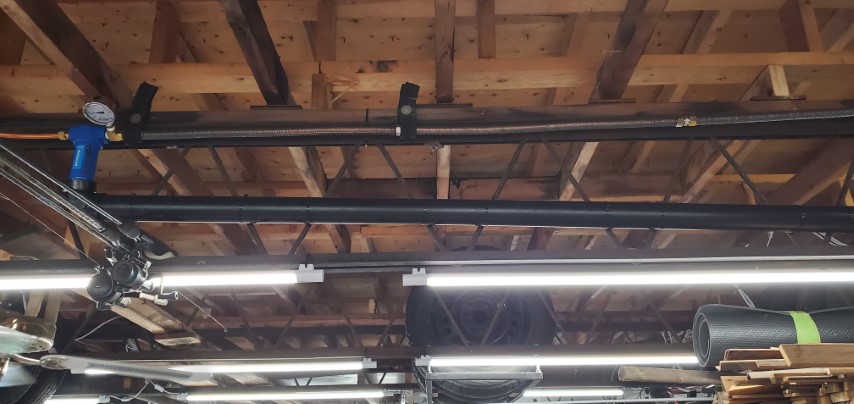
So as a reference here’s a before shot of how the system is.

There are a few deficiencies I want to remedy with my current setup that I didn’t realize when I first made it. One of the main ones is not being able to see the tank pressure when I have the system off. Sure I have 2 pressure gauges on the tank but to see those I would need to climb a ladder. I also want to put in a system regulator since I have noticed I’ve been using regulated air more often than straight tank pressure. With my current setup, I’m worried that I will somehow damage the regulator I attach when I need it.


I’m also starting to run the hose that will go to the front of the garage for the other hose reel.


Alternatively, you can watch this video here.
Update #42
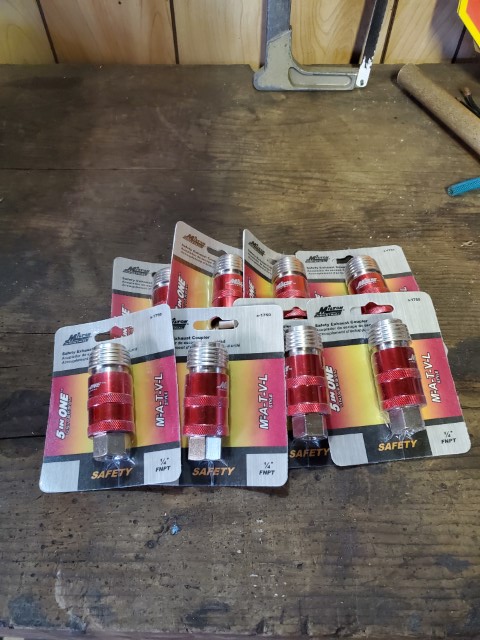
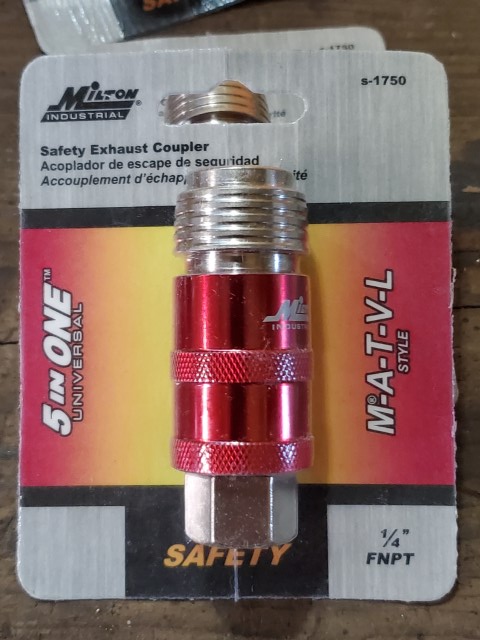
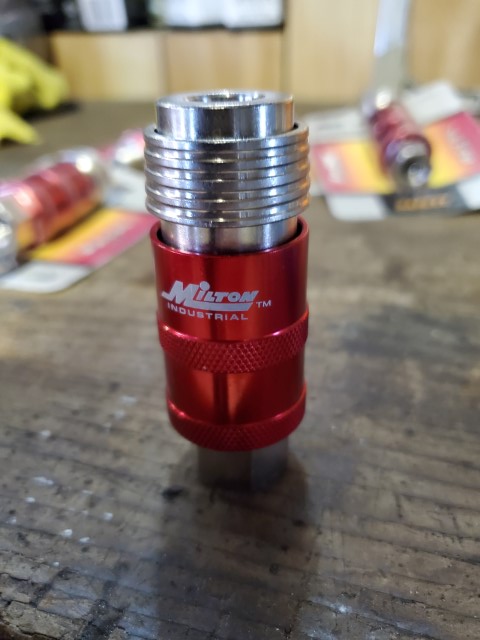
So while at work I was trying to look for some better air hose couplers for a customer and I happened to come across these Milton Push-Button Safety Couplers. They are M-style couplers and I wanted them since you have to release the male fitting twice. This is great if you have something like another air hose connected to your system and need to disconnect it under pressure. These will prevent the hose from shooting out under pressure and whipping around possibly causing injury.


Update #43
Here I’m replacing the hose on one of the other Mastercraft hose reels part# 058-8395-6 some pics and a video.


Update #44
Here are some pictures of the reel installed between the front garage doors.


Update #45
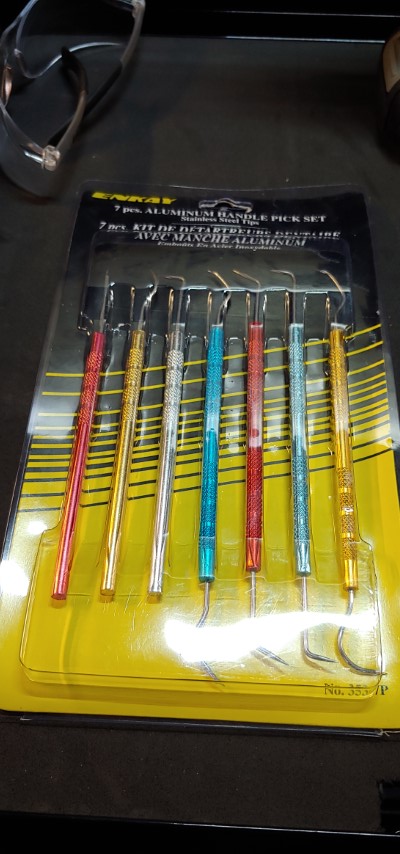
Picked up some small picks which are great for pulling o-rings and seals out of small parts.

Update #46
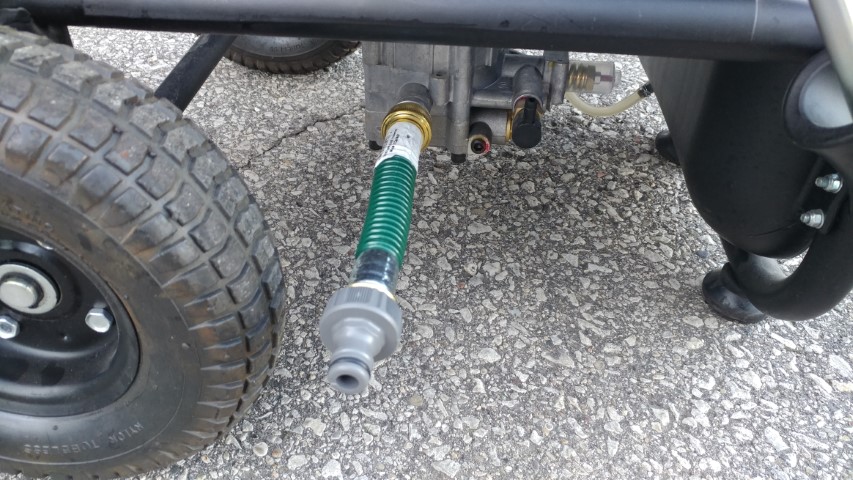
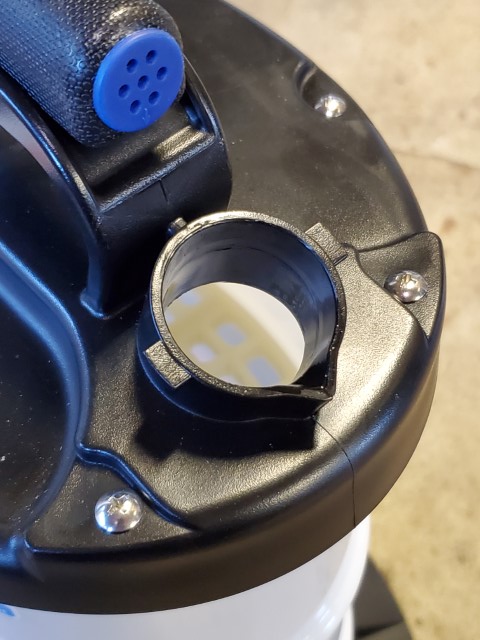
I finally am getting to finalizing my air tank drain for the compressor. I wanted to put a filter to catch any debris and be able to see how much moisture is coming out of the tank. Since I now have the old air filter, I can use that for this purpose. The only issue is that the filter doesn’t have a mount for it and Canadian Tire doesn’t sell a mount for it. So since I can’t buy one easily it’s time to make one.

Update #47
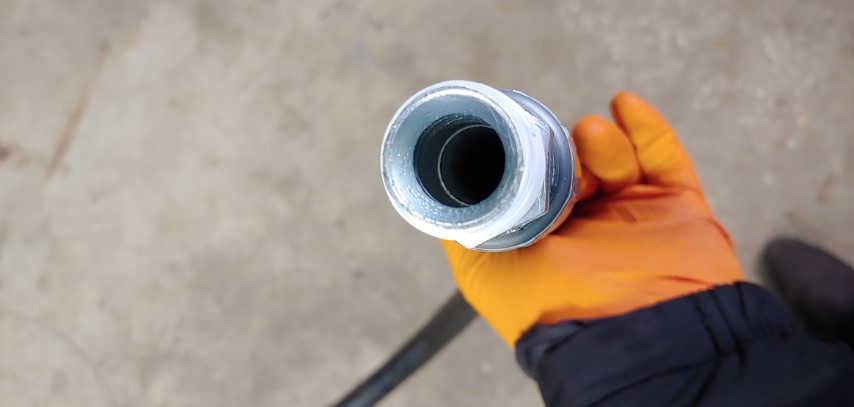
Here are a few pictures of the new drain setup. I already noticed some issues with it. I should’ve added a shut-off valve before the filter so I can drain it. Initially, I was planning on draining the entire tank to empty it but when I tried that it took a long time and it was a big waste of energy. So I will have to add that in later.

Update #48
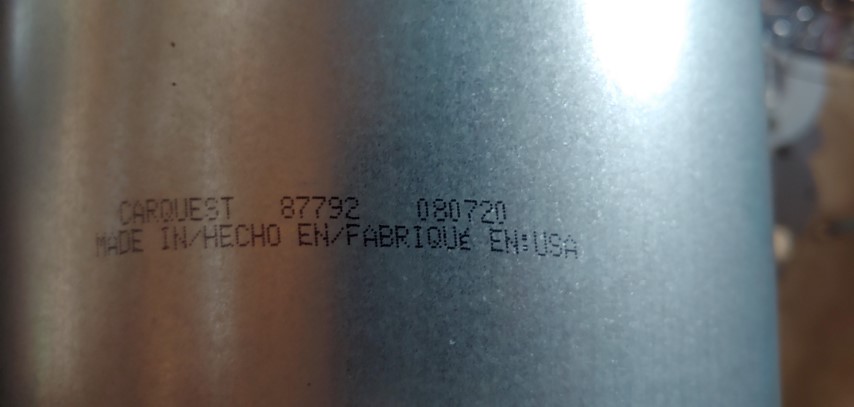
So for reference, in case the number rubs off, this is the number that is on the filter I bought that I want to add for the intake filter on the compressor.
Update #49
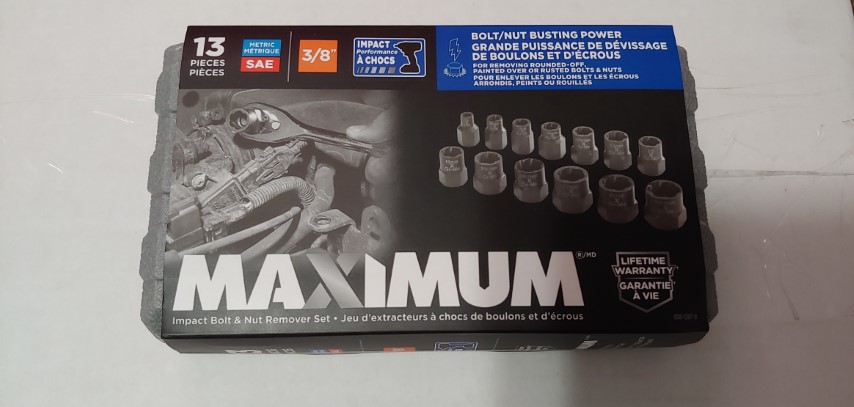
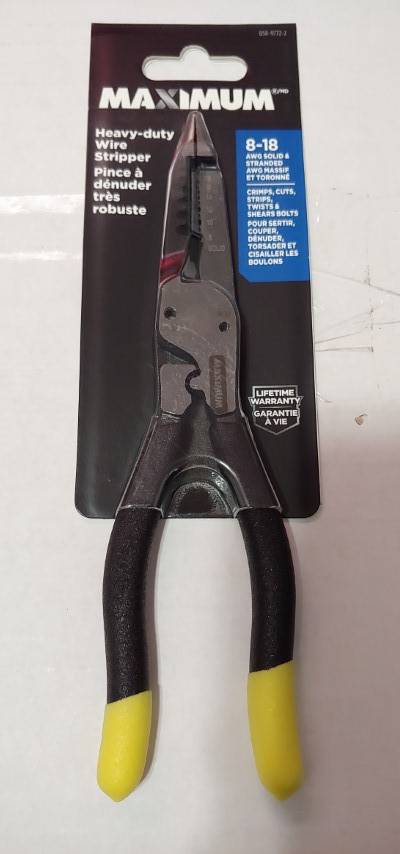
Some more tools again, on sale of course! I’m sure one day I’m going to get to a point where I won’t be buying so many tools but that point isn’t today. I bought a bolt/nut remover set since I don’t have any at the moment other than just vise grips. I also bought a heavy-duty wire crimper/stripper and so far it looks like it will be the most used one out of all the ones I currently own.

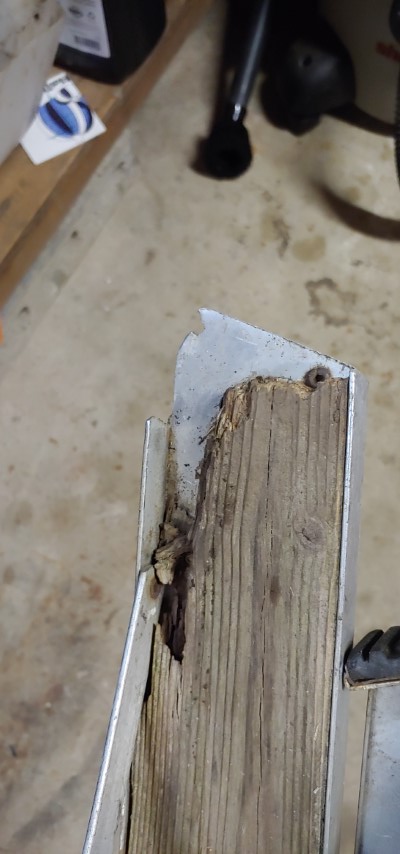
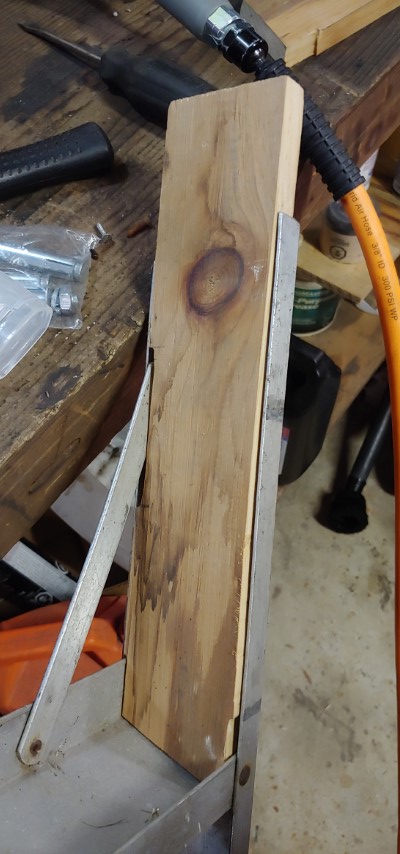
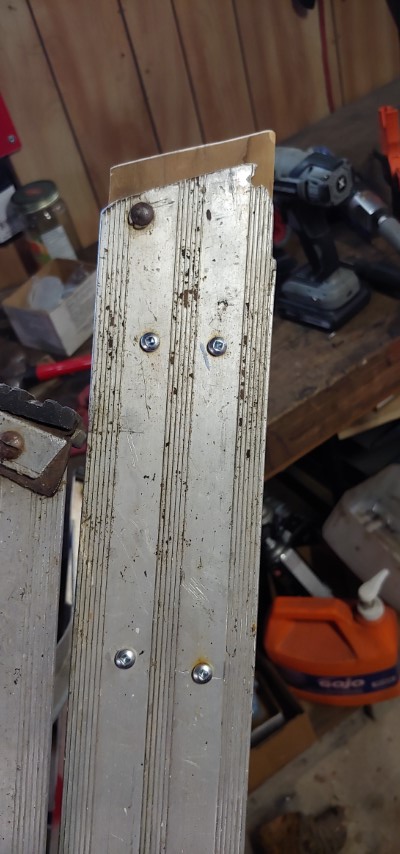
So I’m not sure if this should be put here or just in the gallery but while using the ladder we have I got a little annoyed with it and now I need to use the ladder in the house on our wood floors. The problem is this ladder is quite old and beat up. So before using it I had to repair the feet on it to not damage the floor in the house.


Update #50
Well not too much progress on the garage/shop lately but I’m buying more tools. I am planning a small project for the garage soon and some of these tools I hope will help with that.
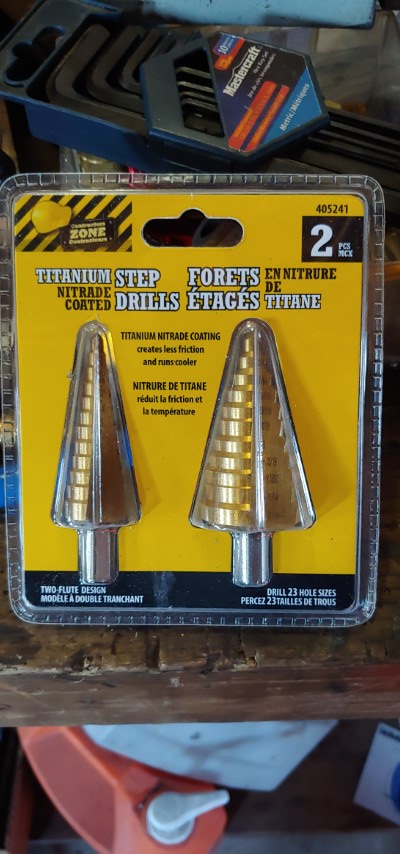
Step drills are something that I’ve always wanted but never bothered to invest in until now.

I know it’s just plastic but they drill such a nice hole in thin material.

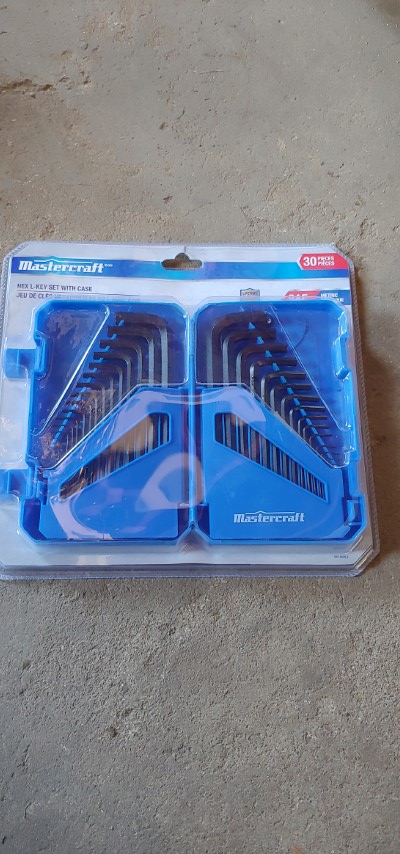
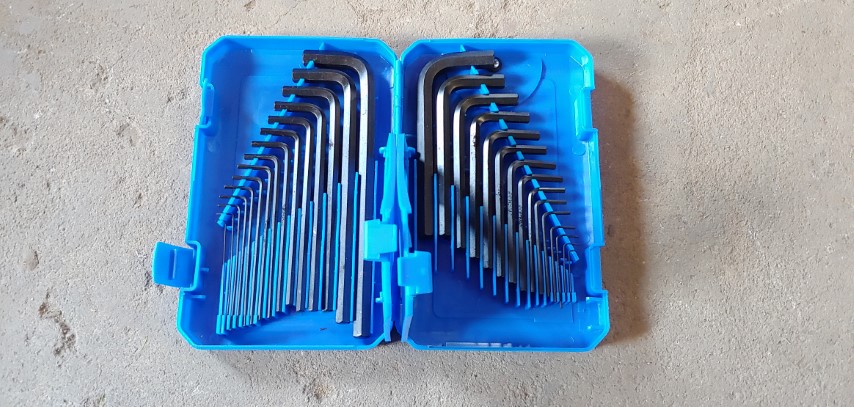
I’ve needed a full set of allen keys for a while now and this long set of metric and sae was on sale, naturally, and I was slightly disappointed that the metric side of the set was quite a bit shorter than the sae side.
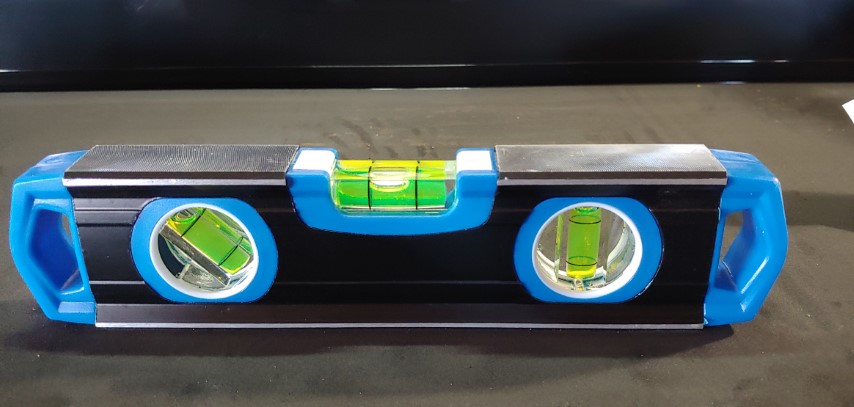
And lastly a small level. I have larger ones but if I have space constraints I didn’t have a smaller one.
Update #51
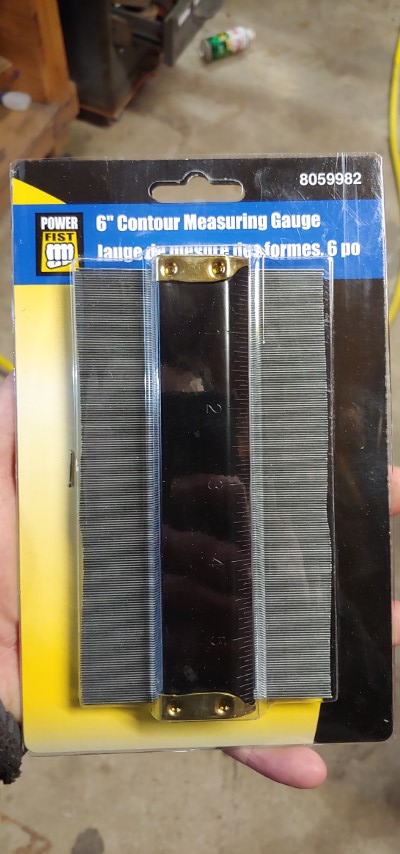
I know this is getting repetitive but more tools! It’s pretty hard to walk out of Princess Auto(it’s like the Canadian version of Harbor Freight) without having purchased anything. Today it was a contour gauge and a pneumatic paint shaker.


Update #52
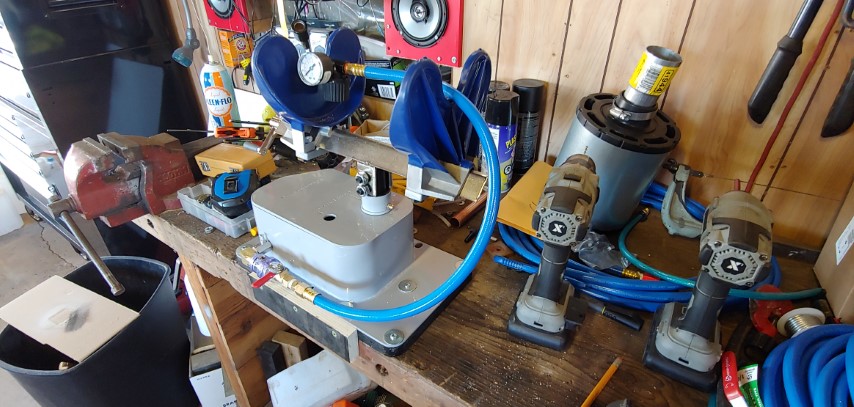
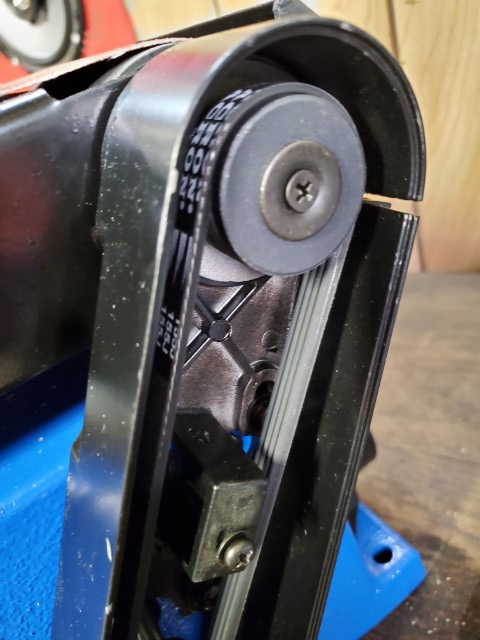
Ok, ok, last tool update before starting the small garage project. I don’t have any sort of decent bench sanding capability and there was one on sale so I thought it was a good idea to get one.
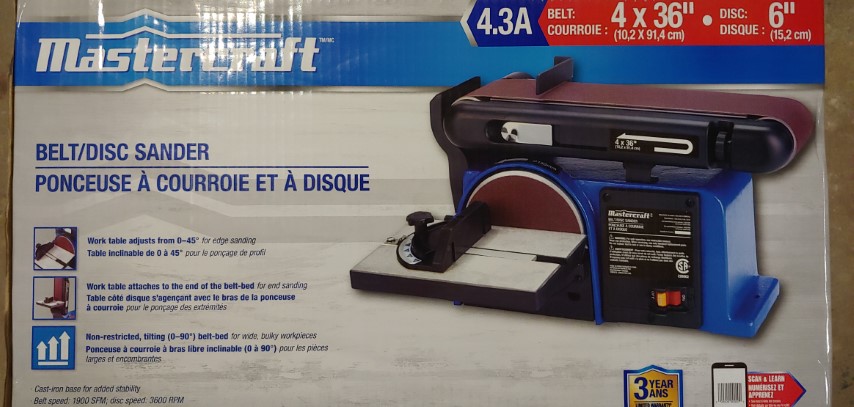
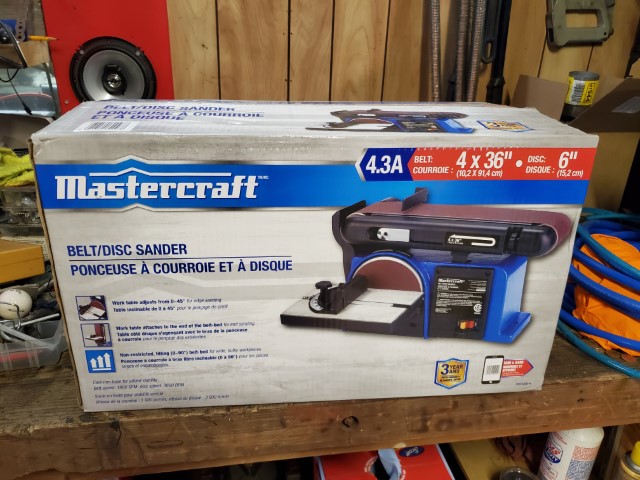
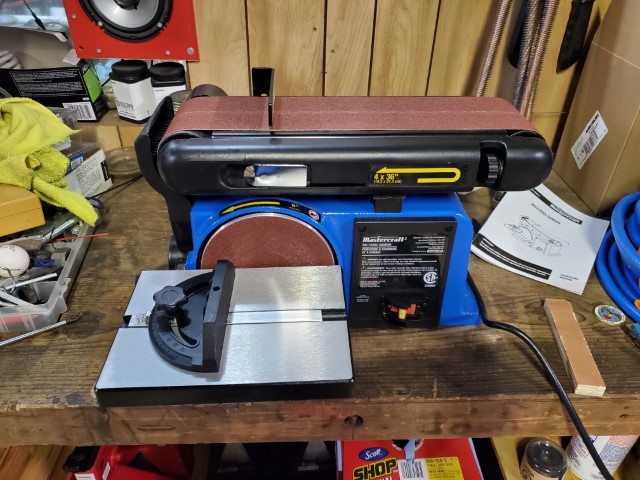

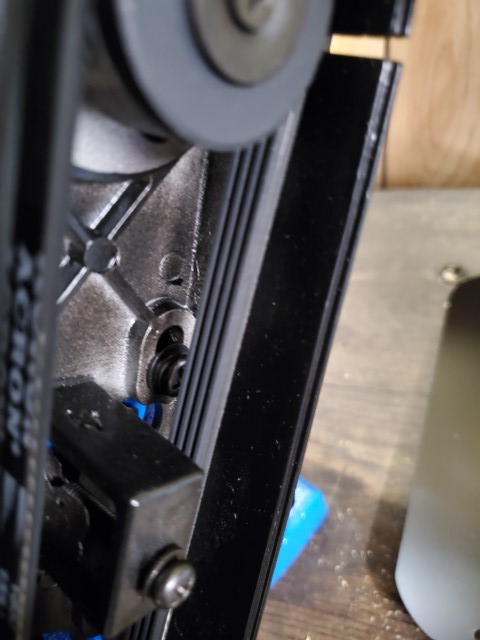
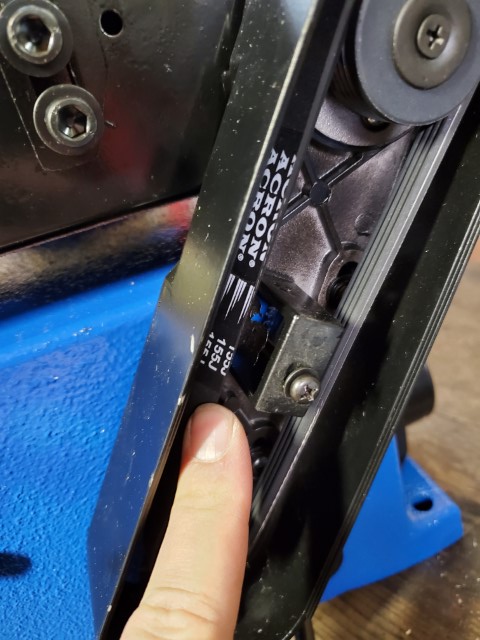
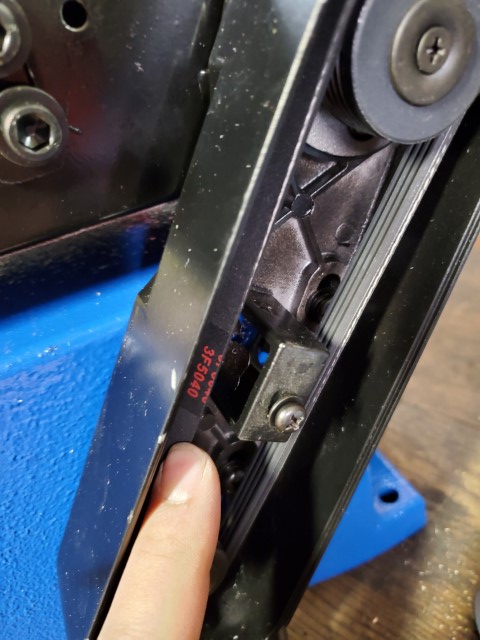
The only thing that has me worried about this is that since it’s a big box store item and probably made to the cheapest standards they can but keeping within spec is that they use some weird standard parts. The sanding disc and belt are standard and the bearings seem to be standard but this drive belt has me a little worried. I’ve tried searching for it online but can’t find any info on this tiny micro v-belt. The drive train looks like it’s simple enough so I might be able to get some new pulleys machined in the future if the belt ever wears out. Seems like a decent enough unit, especially for simple home use.
Update #53
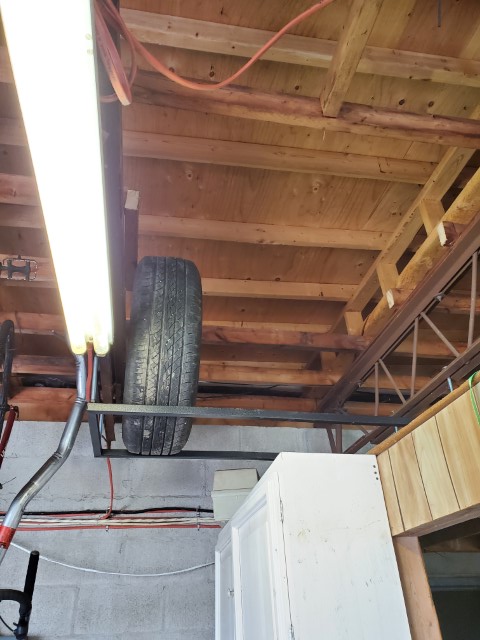
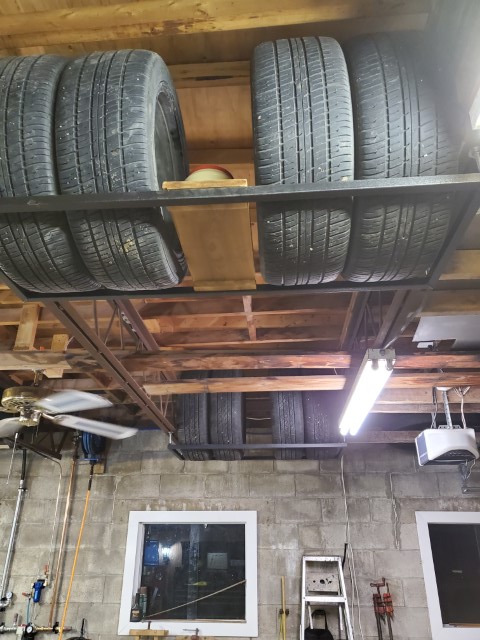
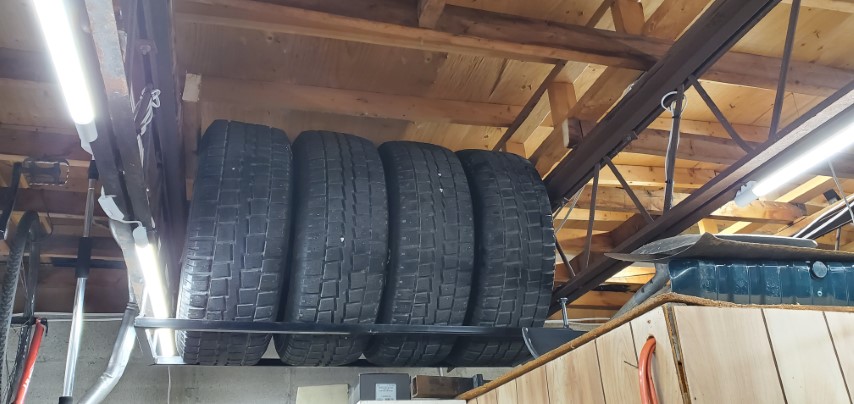
Ok, here it is time to start that project I’ve been talking about. Let’s start with a little bit of background. So, it’s tire season and well I have all our tires stacked nice and neatly on tire dollies which makes it very easy to move them around but do nothing to save floor space. Then while I was putting on some winter tires I looked up at the space pictured below and thought, “Wow that would be a great spot to store some of these tires.”
Yea that would make a great spot for tires. After looking some more the entire row between these 2 steel trusses would actually be perfect for all the tires we have for the 3 vehicles. First, step is to relocate the air line going to the front hose reel and while I’m at it I might as well “properly” plumb the air line to the hose reel at the rear of the garage.


Update #54
Alright, so I have somewhat of a game plan. I’m going to make some simple rectangles from 1″ square stock which I will suspend from the roof trusses. I bought the square stock from work but it wasn’t quite long enough so some long welding sessions were ahead of me.
After welding and cleaning up all my welds, I did some test fitting with a set of tires. I then drilled holes in each corner of the racks.


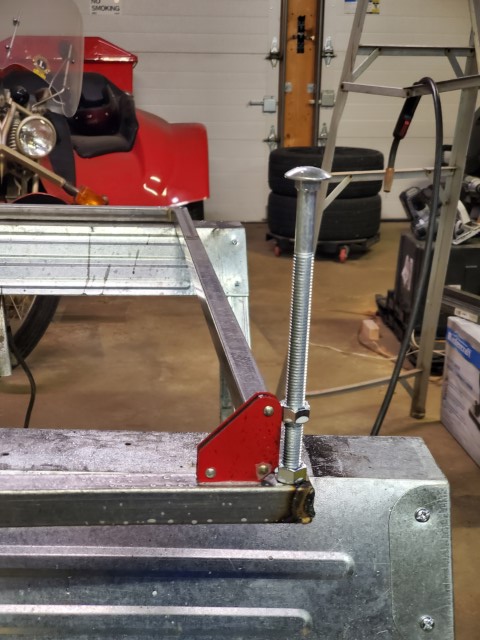
Welding a nut over top of the holes will allow me to slip a carriage bolt through the roof trusses and into the rack.

After getting everything welded up I gave the racks a coat of gravel guard paint to give them a bit of protection from loading and unloading tires every season.


A little bit of fitment testing before finalizing the mount.
Here’s a close-up of how the racks are mounted to the roof trusses. It’s actually really strong and doesn’t have an issue handling the heavy tires even the ones for the truck. One issue I ran into when testing was that the rack would move quite a bit when there was no weight on it so that prompted me to use an additional nut to secure the carriage bolt into the trusses once I got them screwed into the racks.
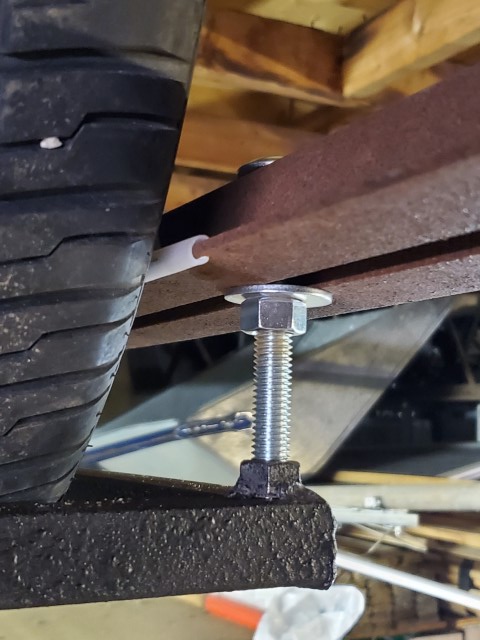
There was one spot where the metal of the trusses would’ve hit against the rim of the tire sets so I just cut a length of hose down the middle and installed it to protect the rims I would store there.

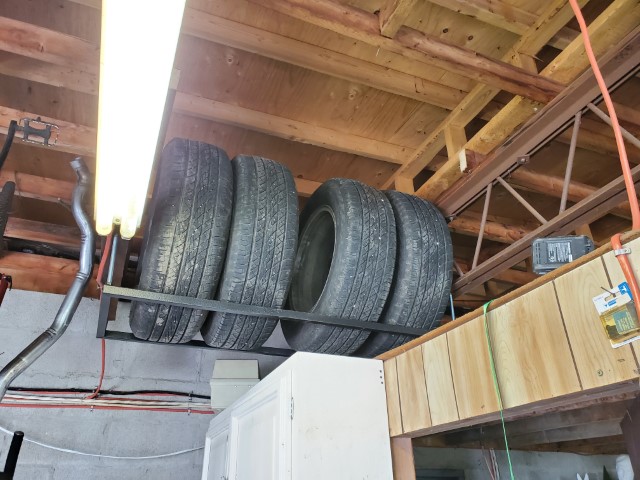
That is pretty much it for this project, so enjoy some pictures of the racks with the tires on them. I gotta say it saves a ton of room on the floor and makes some usable space out of previously unusable space.


Update #55
So I guess I should post a toolbox tour of my box since I’ve had it for a bit. This was originally filmed in 2021 and I never got around to posting it until now. Enjoy.
Update #56
So it looks like I’ve been having some issues with the Milton safety couplers. It seems when left under pressure without being used the coupler gets quite stiff to attach a tool. The problem only worsens when the temperature drops. I’ve contacted customer support about the issue and we’ll see what they’re gonna do. You can see the relevant videos below.
Edit: It looks like Milton is going to replace all my couplers with the newer 5-in-1 safety couplers. They should be arriving in a week or two.
Update #57
Not sure if I should place it here or in with the garden stuff but it stays in the garage so here it is, a new addition to the tools. It’s not for me but I might end up using it from time to time.


Update #58
More tools do I need to say more?


Update #59
Ok so those replacement Milton couplers finally arrived and these are nice, like really nice. They’re all metal and feel super durable. They work a little differently from the ones they’re replacing, instead of a push button they have 2 locking rings.


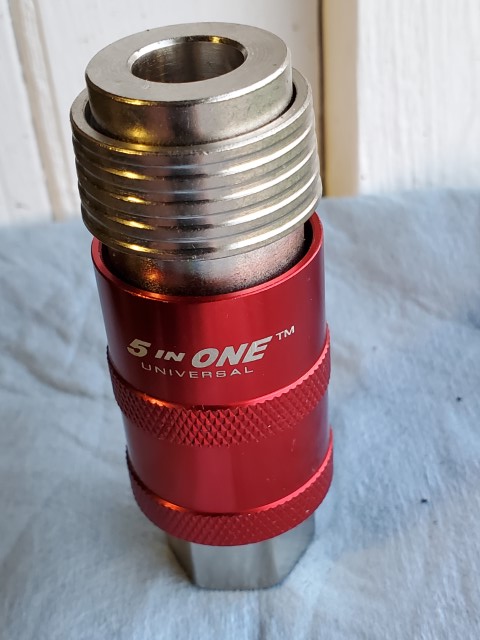

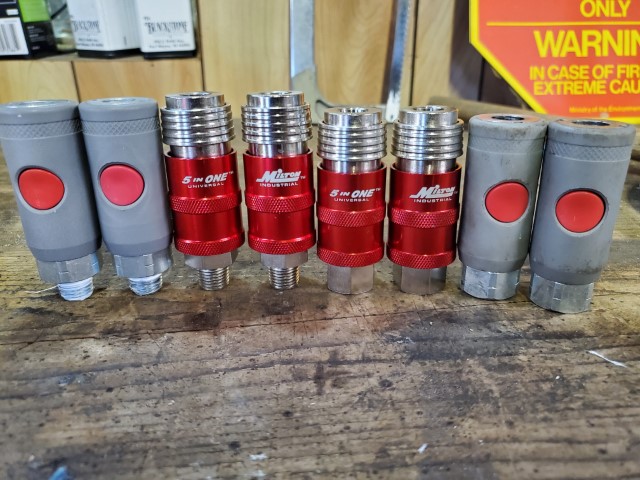
These seem really nice not sure about durability yet so I’ll have to do a long-term review at some point. I’m also not sure if I should replace the fittings on the main part of the system since those aren’t used as much as the hoses.
Update #60
So I’ve decided to replace all the couplers. After a week of use, they have been absolutely perfect. They also take multiple types of fittings. Other than being slightly on the heavier side from being all metal there aren’t any downsides I can think of. Additionally, I bought a few other things to improve the compressor setup even more.


Yup, that looks nice.
Update #61
So been working on some things. Doing some work on the neighbor’s cars, turns out they will need brakes soon. Also, got another tool, again. Some tool maintenance too.

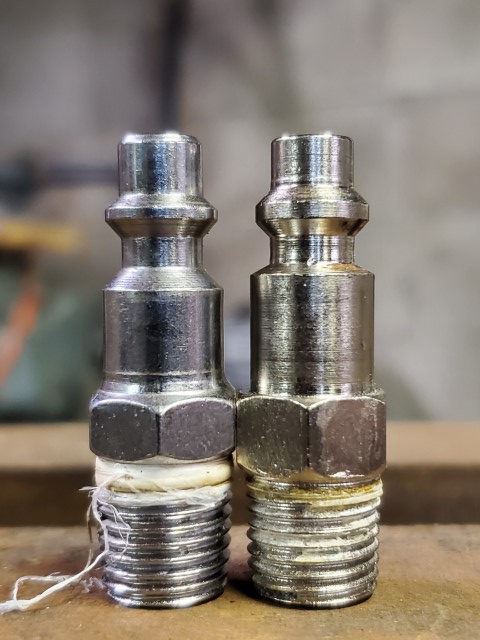
For some reason, the included fitting wouldn’t fit in any of my couplers even the new Milton ones. There’s a slight difference you can see but it didn’t look like it was enough to cause a problem.
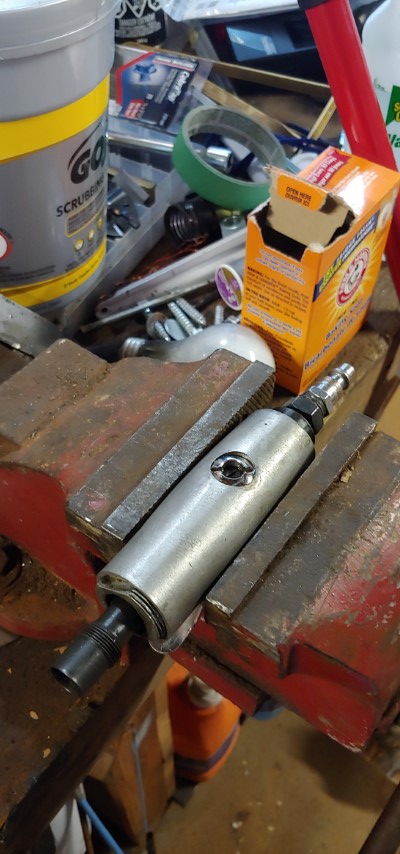
While I was doing the maintenance on the cars my die grinder started to die on me so I wanted to find out why. Turns out it was a pin that came loose in the motor so after replacing it the grinder was back to normal.

Update #62
Nothing major in this update just reporting that the water drain for my air tank works well. I’m not sure if I’ve mentioned this before but after getting the new toolbox and selling one of them I need a place for the 2 that have sentimental value to me. I have basically given them to my mother since she always complains that she doesn’t want to mess up my tools. There are lots of extra tools that she can have and use so I thought it would be perfect to set up the back corner of the garage for her as that is where she would be accessing the garage most in the summer. I also have an in-progress picture from a month ago that I forgot to post.


With that view, it looks like I have tons of space even though it doesn’t feel like it.
Update #63
So I did an oil change on the truck and am really grateful for my oil drain pan. It can be sealed when not in use and holds a couple oil changes worth of oil for my vehicles. The only problem is that some items especially small equipment don’t have any space to use an oil drain pan, prompting another tool purchase.
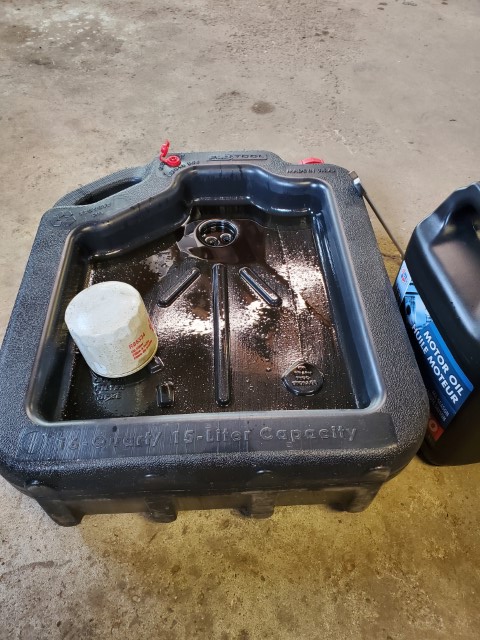
Well, yeah I bought a fluid extractor. This one is nice since it is both manual and pneumatic which will come in handy. I was tempted to purchase one through work which are more professional oriented. While the ones I can get at work have more fluid capacity they are either manual or pneumatic only and expensive. I don’t exactly want to keep 2 different extractors just in case I need one over thee other. So when I saw this Princess Auto special I jumped at it.
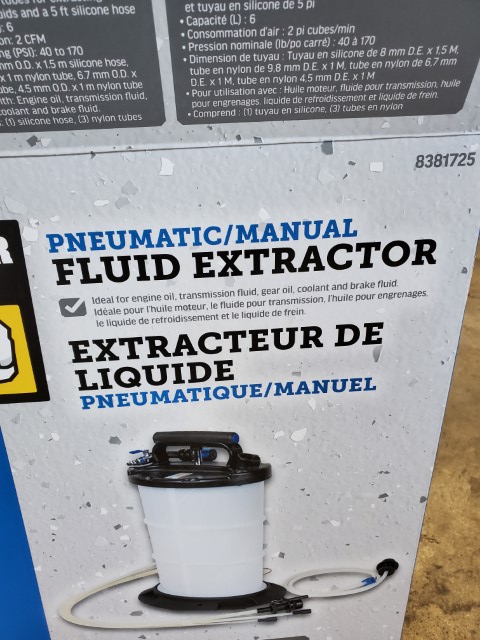
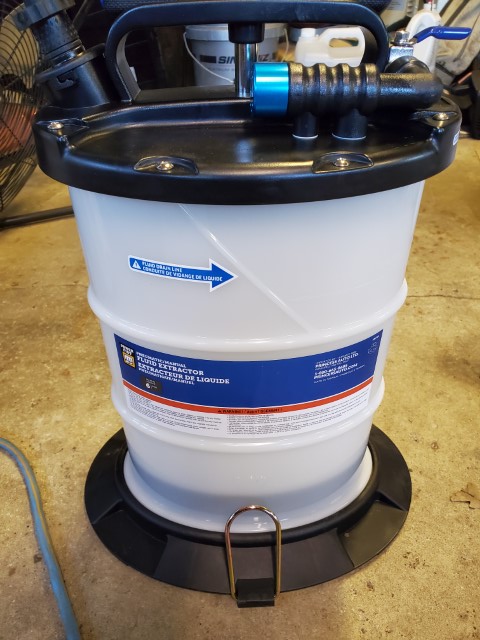
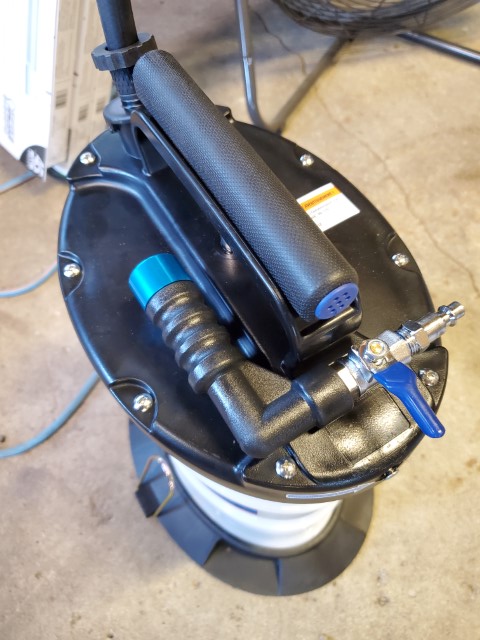

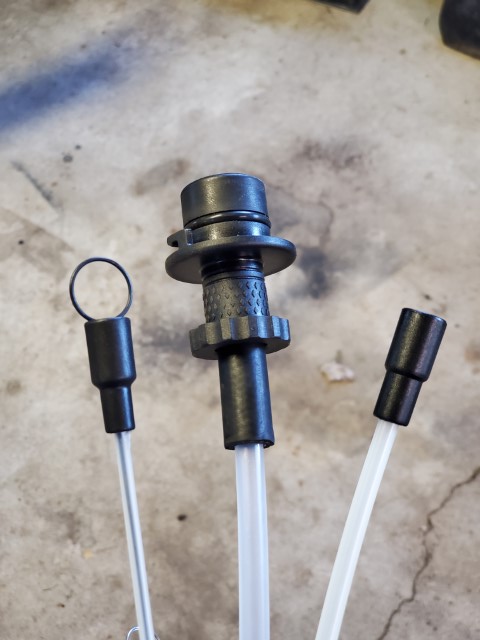

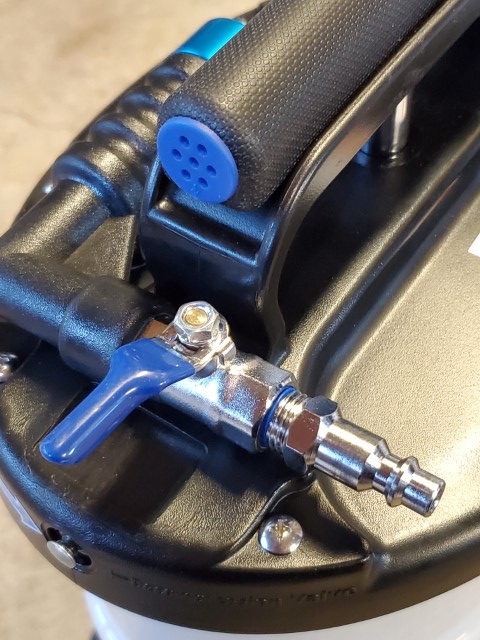


For the price I paid it has a ton of features. Came with 4 different attachments and even has internal bracing to prevent the container from collapsing.
Update #64
So we’re still in the midst of COVID. If you’re reading this in the future it was basically a very aggressive flu. It was pretty bad and it seems like everyone is going overboard with precautions. As such, it was mandated that businesses could only be open for curbside pick-up. Meaning there’s no in-store shopping. That didn’t slow me down though from buying more stuff for the garage.
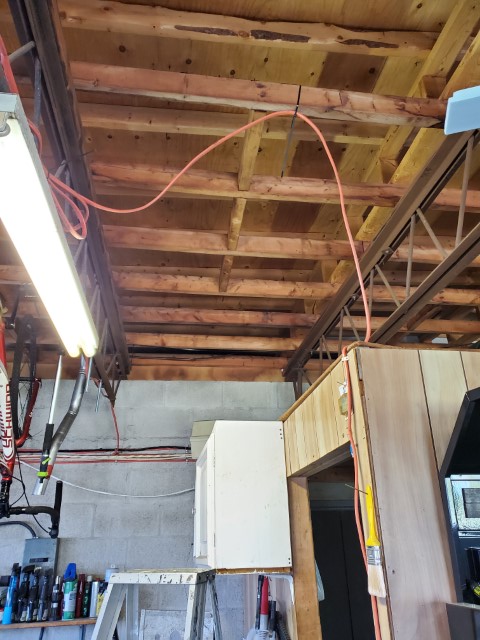
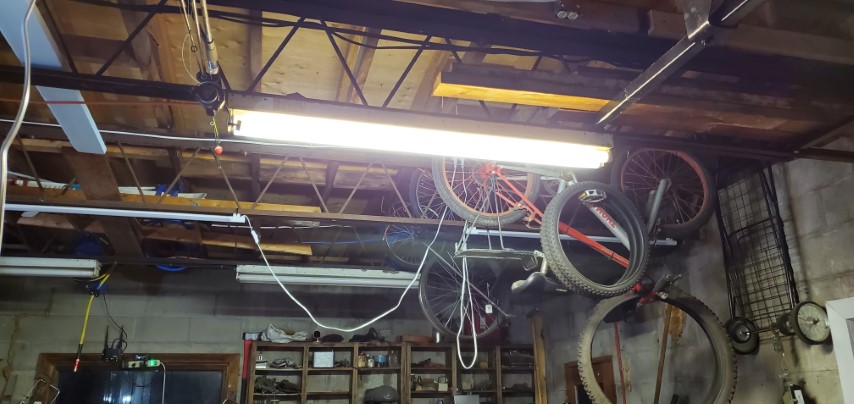
One thing that every garage needs is good lighting. I can’t say it enough, “If you can’t see what you’re working on, you can’t fix it”. Honestly, my current lighting situation isn’t great. I currently have 6 fixtures(one in the enclosed room) in the garage with 2x T8 bulbs each. At about 2300 lumens per bulb that’s 27600 lumens for the entire garage and with the size of the garage being approximately 36′ long by 21.5′ wide giving me 774 sq. ft. I have 35.66 lumens per sq. ft. So it’s dim, they have a hard time turning on in the cold, take a while to get to full brightness, the switches are all over the garage and I can’t forget to mention at 40 watts per fluorescent tube my current setup uses 480 watts. That’s kinda crappy.
If you were to search “how many lumens per sq. ft. for garage” you’ll probably come across this article: https://www.bobvila.com/articles/garage-lighting/
According to their article, “The Illuminating Engineering Society (IES) Lighting Handbook recommends 50 lumens (a measure of light output) per square foot in residential garages and 300 lumens per square foot in workshop areas.”
So according to that, I do fall short of the recommended 50 lumens per sq. ft. and would need a total of 38700 lumens to meet the minimum.
I was contemplating just buying additional tubed fixtures and converting them to LED bulbs but while shopping around I found the following at my local stores:

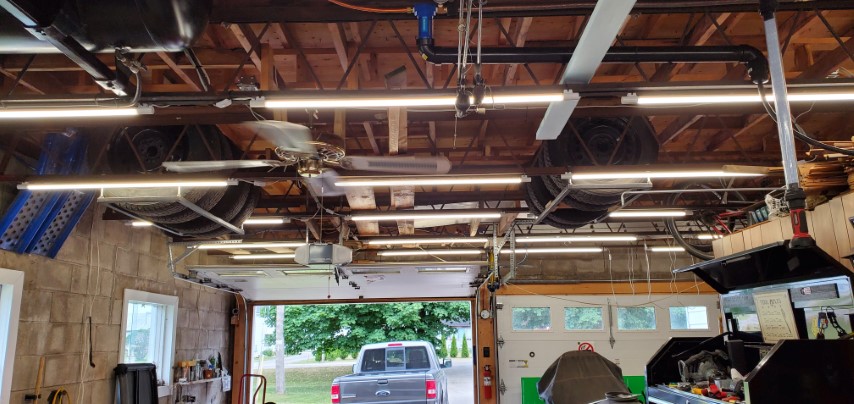
Each tube offers 1850 lumens and only uses 18 watts, so at that, I would need approximately 21 fixtures. They are also all plastic avoiding the metal housing rusting like my current fixtures. They also simply plug in with a 2-prong outlet. So I bought some, because they were on sale, naturally.

This isn’t all of them but I do plan on having 3 fixtures per roof rafter so with 8 rafters that’s 24 fixtures giving me 44400 total lumens getting me past the 50 lumens per sq. ft. minimum. Also, at 432 watts I’m still under my previous usage which is great.

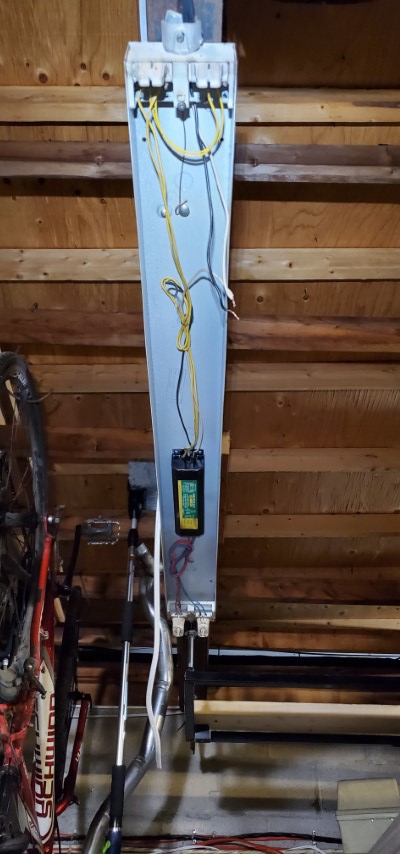
So, normally these are either hung from an included 6-inch metal cable or fixed using the keyhole slot. Neither of those options is ideal for my situation and I’ve decided to drill holes into the side of the mounting block and just zip-tie each fixture to the

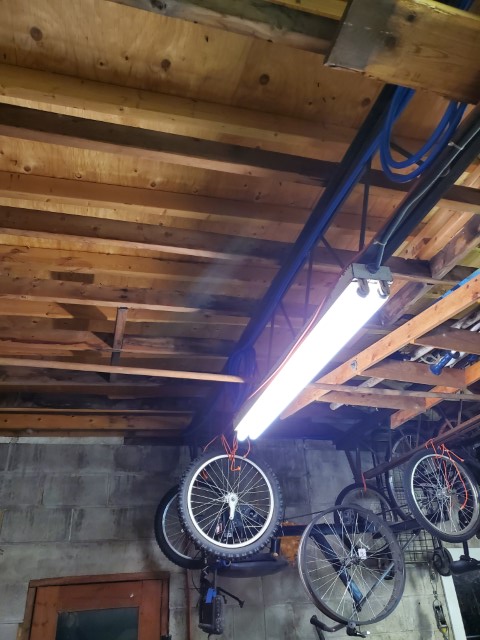
I’ve mounted 4 of them into place and already the additional light output is great. I can’t wait to get them all mounted.

Update #65
Well, this post was going to be a reveal but unfortunately, it’s going to just have to be a teaser.


Update #66
I started getting more materials to start my lighting upgrade however, I have come across a major fatal flaw. Yikes!
So, my plan was to have 3 fixtures per roof rafter, which is fine. Each fixture has to be plugged in with a standard lamp-style plug, which is also fine. The major problem is the receptacles. To be able to run 3 fixtures per rafter I need 2 receptacles leaving a spare plug per rafter meaning the wiring can’t be even. You see where I’m going with this right? My OCD won’t allow it, so I bought more lights and am going to 4 fixtures per rafter. Meaning 32 fixtures total(including the enclosed space) bringing me to 59200 total lumens, 76.5 lumens per sq. ft., and 576 total watts.
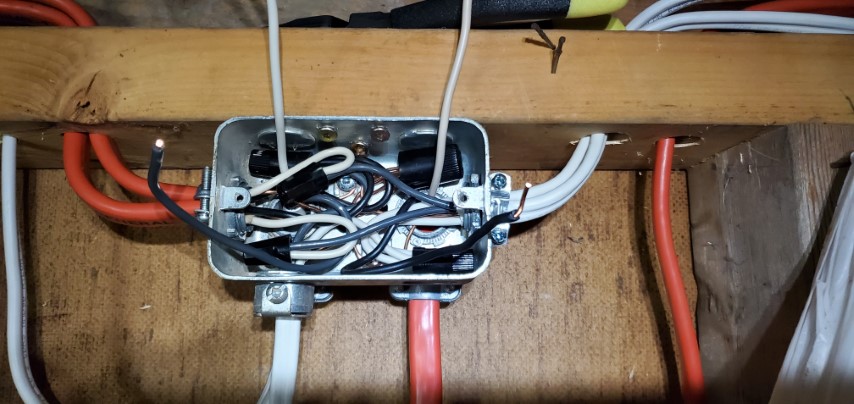
So with the new decision to run 4 fixtures per rafter, my OCD will allow me to also evenly split the lights into 2 individual switches. Now I know I should be using armored cable or conduit to follow code but when you see some of the wiring I’m replacing this is far from being a major issue currently. Also, I’m not planning on puncturing or damaging the wire in any way and if it gets damaged accidentally I can attend to it right away.
Here are some more pictures of the fixtures I’m replacing.
Gotta say there are a lot of off-cuts of insulation when doing wiring. I’m sure electricians know.
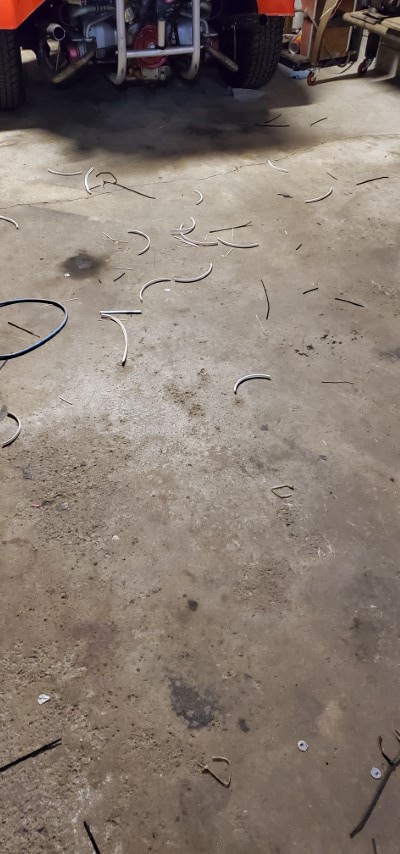
Also, gotta hate when your pack of zip ties falls off the ladder.

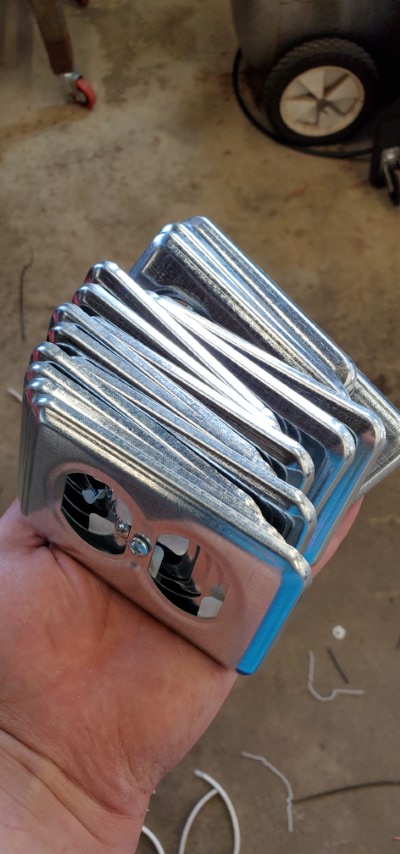
All the face plates for the outlets.
So, in trying to plan for the future I’ve decided I may want to try and run these lights off of solar at some point. Since you can split an electrical outlet into 2 separate outlets I’ve decided to have one side of a plug supplied with grid AC and the other side supplied with solar AC. Then I would just plug the garage lights into the corresponding outlet. Does this follow electrical code? Probably not. Is this cheaper than a dedicated transfer switch for just the garage lights? Most definitely.


Ok, this is so bright compared to what I’m used to, even in the daytime.
While I did manage to get all the outlets installed and most of the fixtures. I had to take a break and I left the last few lights at the rear for another day.


And here’s that bad wire that I was talking about earlier. Turn your sound up and you’ll hear what I mean.
Update #67
So as I said before I was planning on possibly running the garage lights off of solar. I like to think of it as storing sunlight during the day and using it at night. I’ve started to buy supplies to make my setup both less dangerous and more permanent. Again, I’m still not sure if I’m going to lump the solar stuff in with the garage upgrade or not as I don’t know how deep I’m going to dive into it.
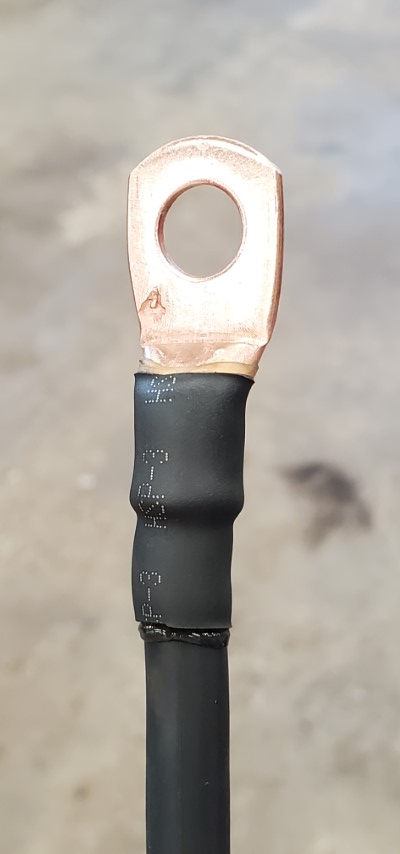
The cabling, cable ends, and heat shrink we sell at work luckily. Hello, employee discount.

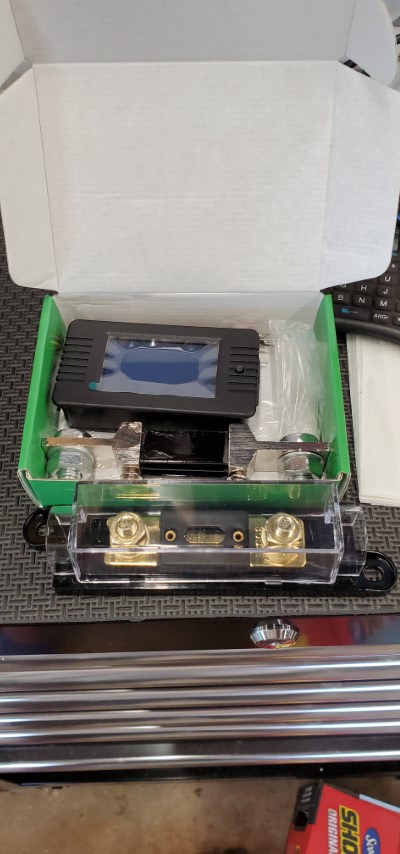
I also got a shunt to monitor my power usage and a fuse holder with fuse.
I also did one test end on a cable. I’ve opted to solder them but it’s quite tricky to heat up the lug and the wire enough without melting the insulation.
Update #68
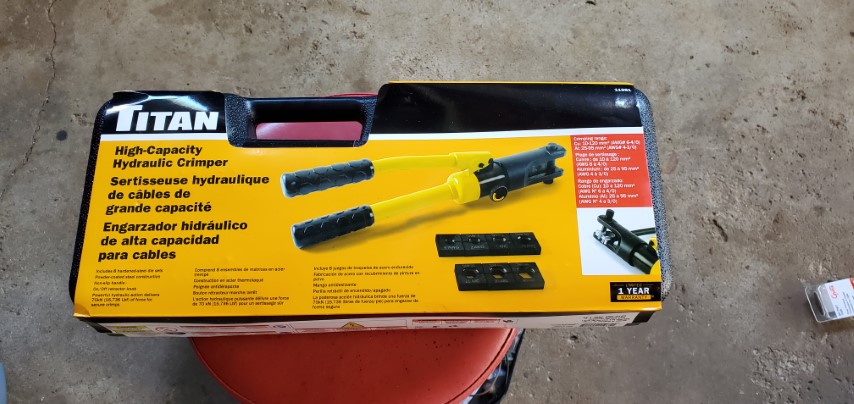
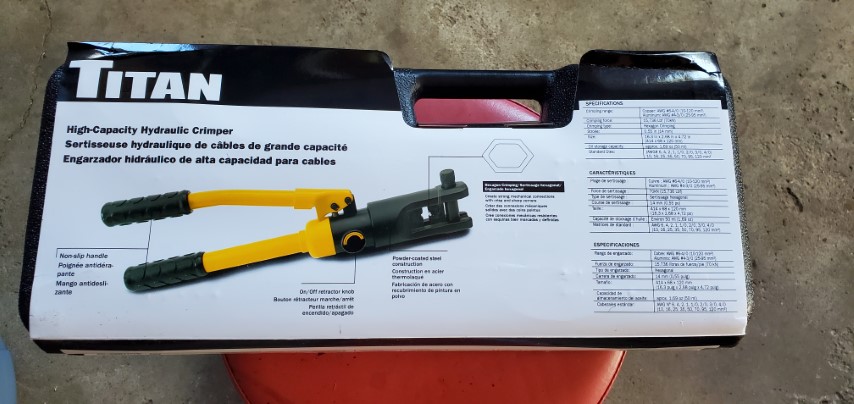
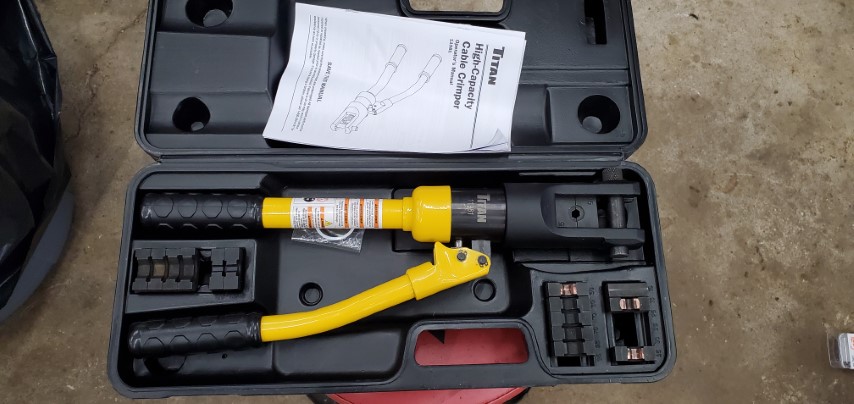
So a few things in this update. I’m redoing my entertainment system in the garage. If you go all the way back to Update #5 you can see a clear picture of the setup I’m going to be replacing. It was something I slapped together real quick but I have definitely outgrown it. Also, I need to clean my bench off as you can see it’s currently a disaster. I bought a hydraulic crimper for cable ends as trying to solder on cable lugs is too finicky to get a good connection. Other than that just some rewiring and adding some solar features to it. I also got around to doing the water remover and hour meter upgrades to the compressor.

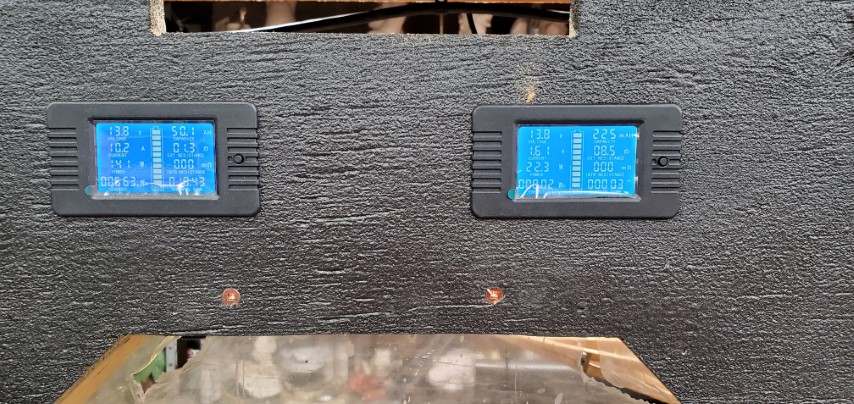
This is the new board that will house everything. The 4 speakers, radio, 2 solar monitors and some 12v outlets.

Those meters seem to fit nicely.
Ok, I don’t try to toot my own horn but that looks nice. In case you were wondering the plywood is painted with rubberized undercoating which will help hide imperfections.

Obligatory audio test:
It’s also nice that these meters are backlit.
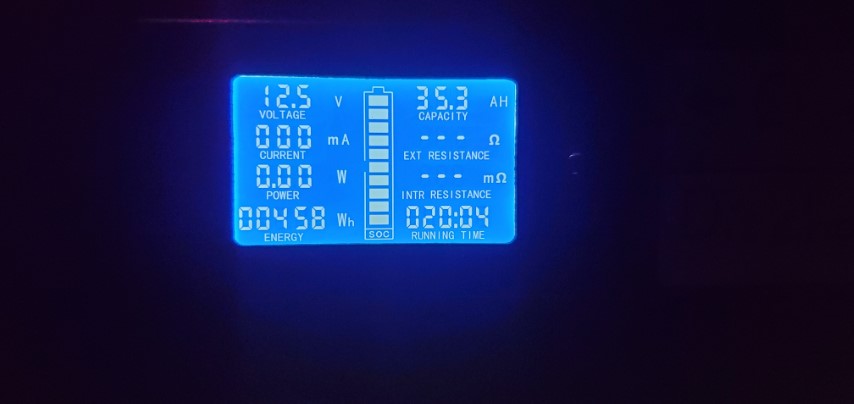
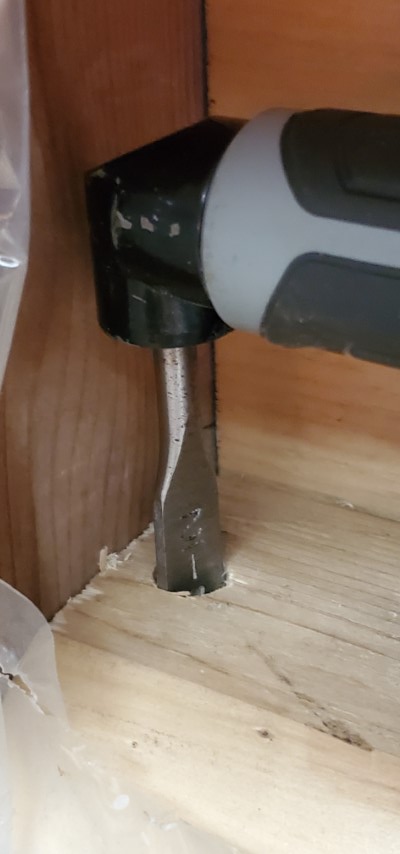
I also had to add to the “make your own tool to get the job done” pile. Needed a low-profile bit to go through a 2×4. Why? You may ask well it’s to add to the system that allows me to do the following test with the meters.


Well, if you haven’t guessed or just haven’t come across my previous updates. I’m going more in-depth with my solar setup. Considering that solar stuff isn’t strictly garage content some people might be interested in just solar content. So, I will try my best to maintain a solar-specific page with any solar updates here also included there.
Finally, the compressor upgrades.

Update #69
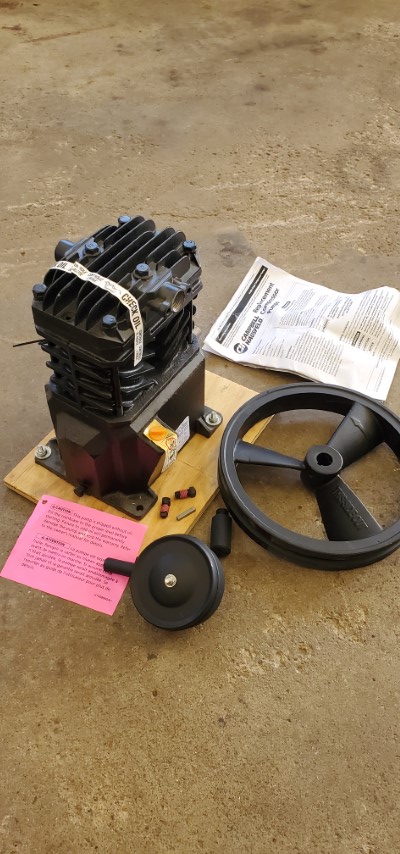
If you follow me on Instagram, which if you don’t you should, you may have already seen part of this update. I might be making a visit to TSC/Peavey Mart a yearly tradition on my birthday. Last year that’s how I found my current compressor pump. Well, I found another one and an insane deal.
Yea that’s 54.97 from 199.99

Now I will say this pump is quite old according to the date on the box. Realistically as long as it wasn’t kept in a humid environment there shouldn’t be anything wrong with it.


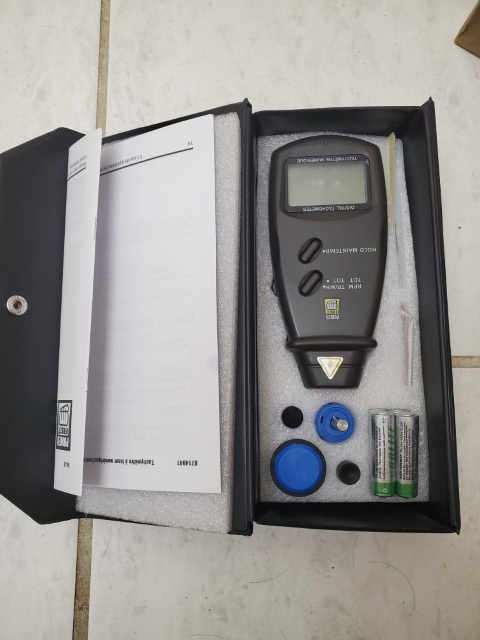
Testing out the tachometer and breaking in the pump.
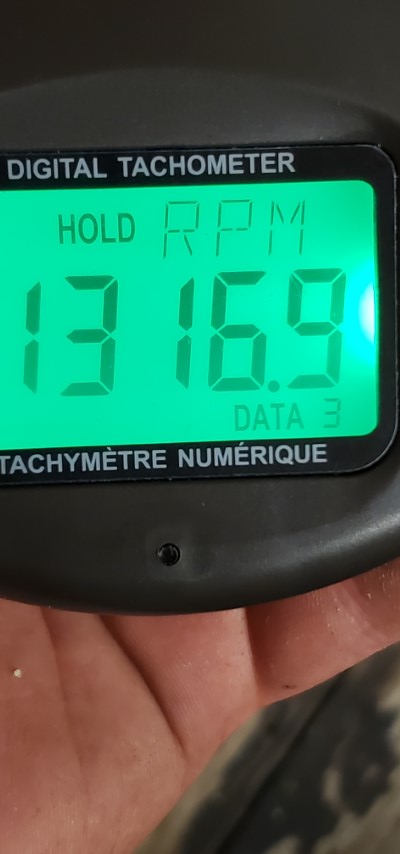
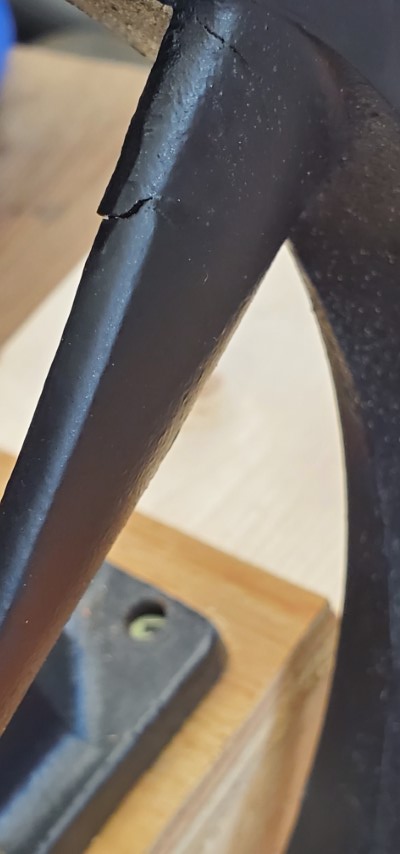
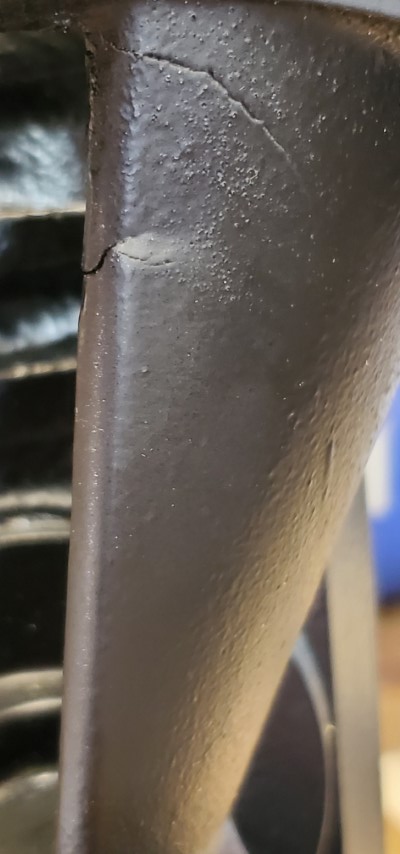
Now the only unfortunate thing is after breaking it in and testing the pump. I noticed a defect on the flywheel. It looks like one of the spokes on the flywheel got a crack during manufacturing. It looks like it might be ok but I contacted the manufacturer and they are sending me a new flywheel when they come in off backorder.
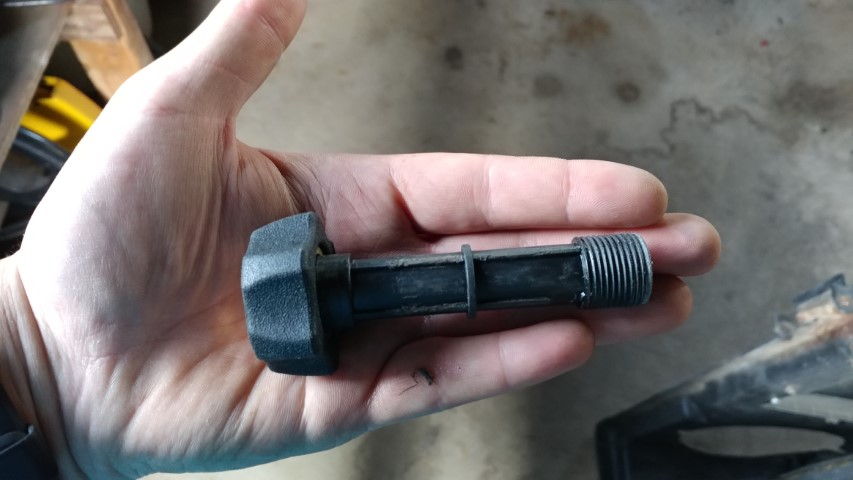
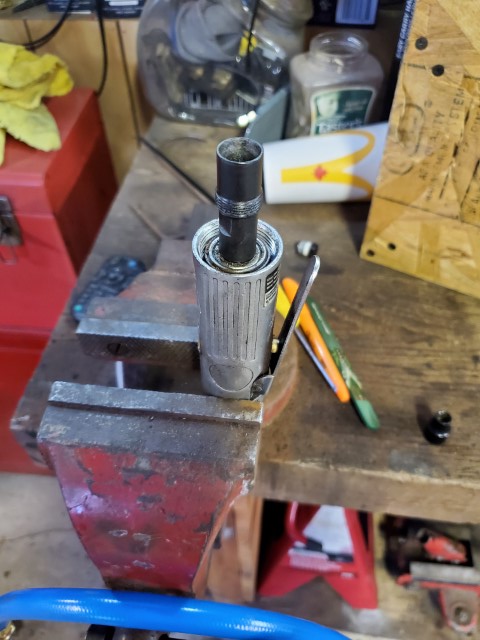
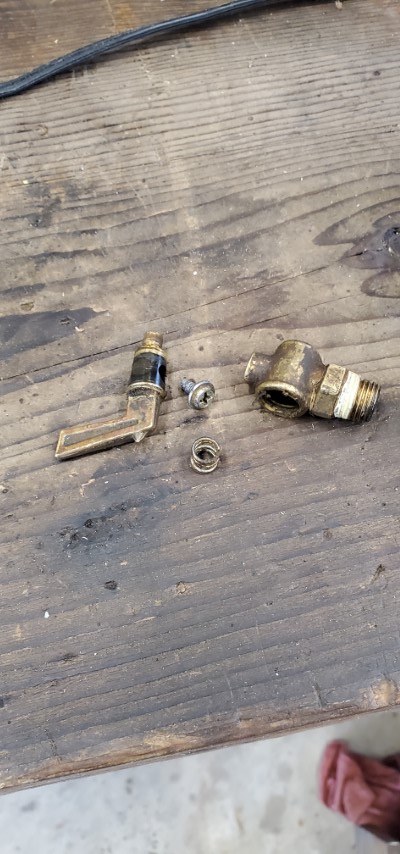
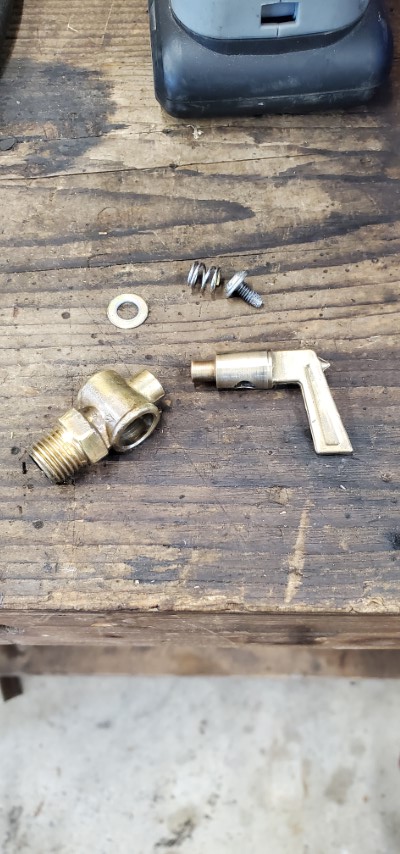
I also rebuilt an old drain valve.


Update #70

